AI Voice Agent
Never miss another call.
Learn more

AI Voice Agent
Never miss another call.
Setting up phone calling for Microsoft Teams using Direct Routing is straightforward with our PowerShell wizard. It automates what would otherwise be a complex setup. You only need your Teams domain and Teams Phone licensing—we handle DNS, users, numbers, PSTN, and routing.
Review these useful guides:
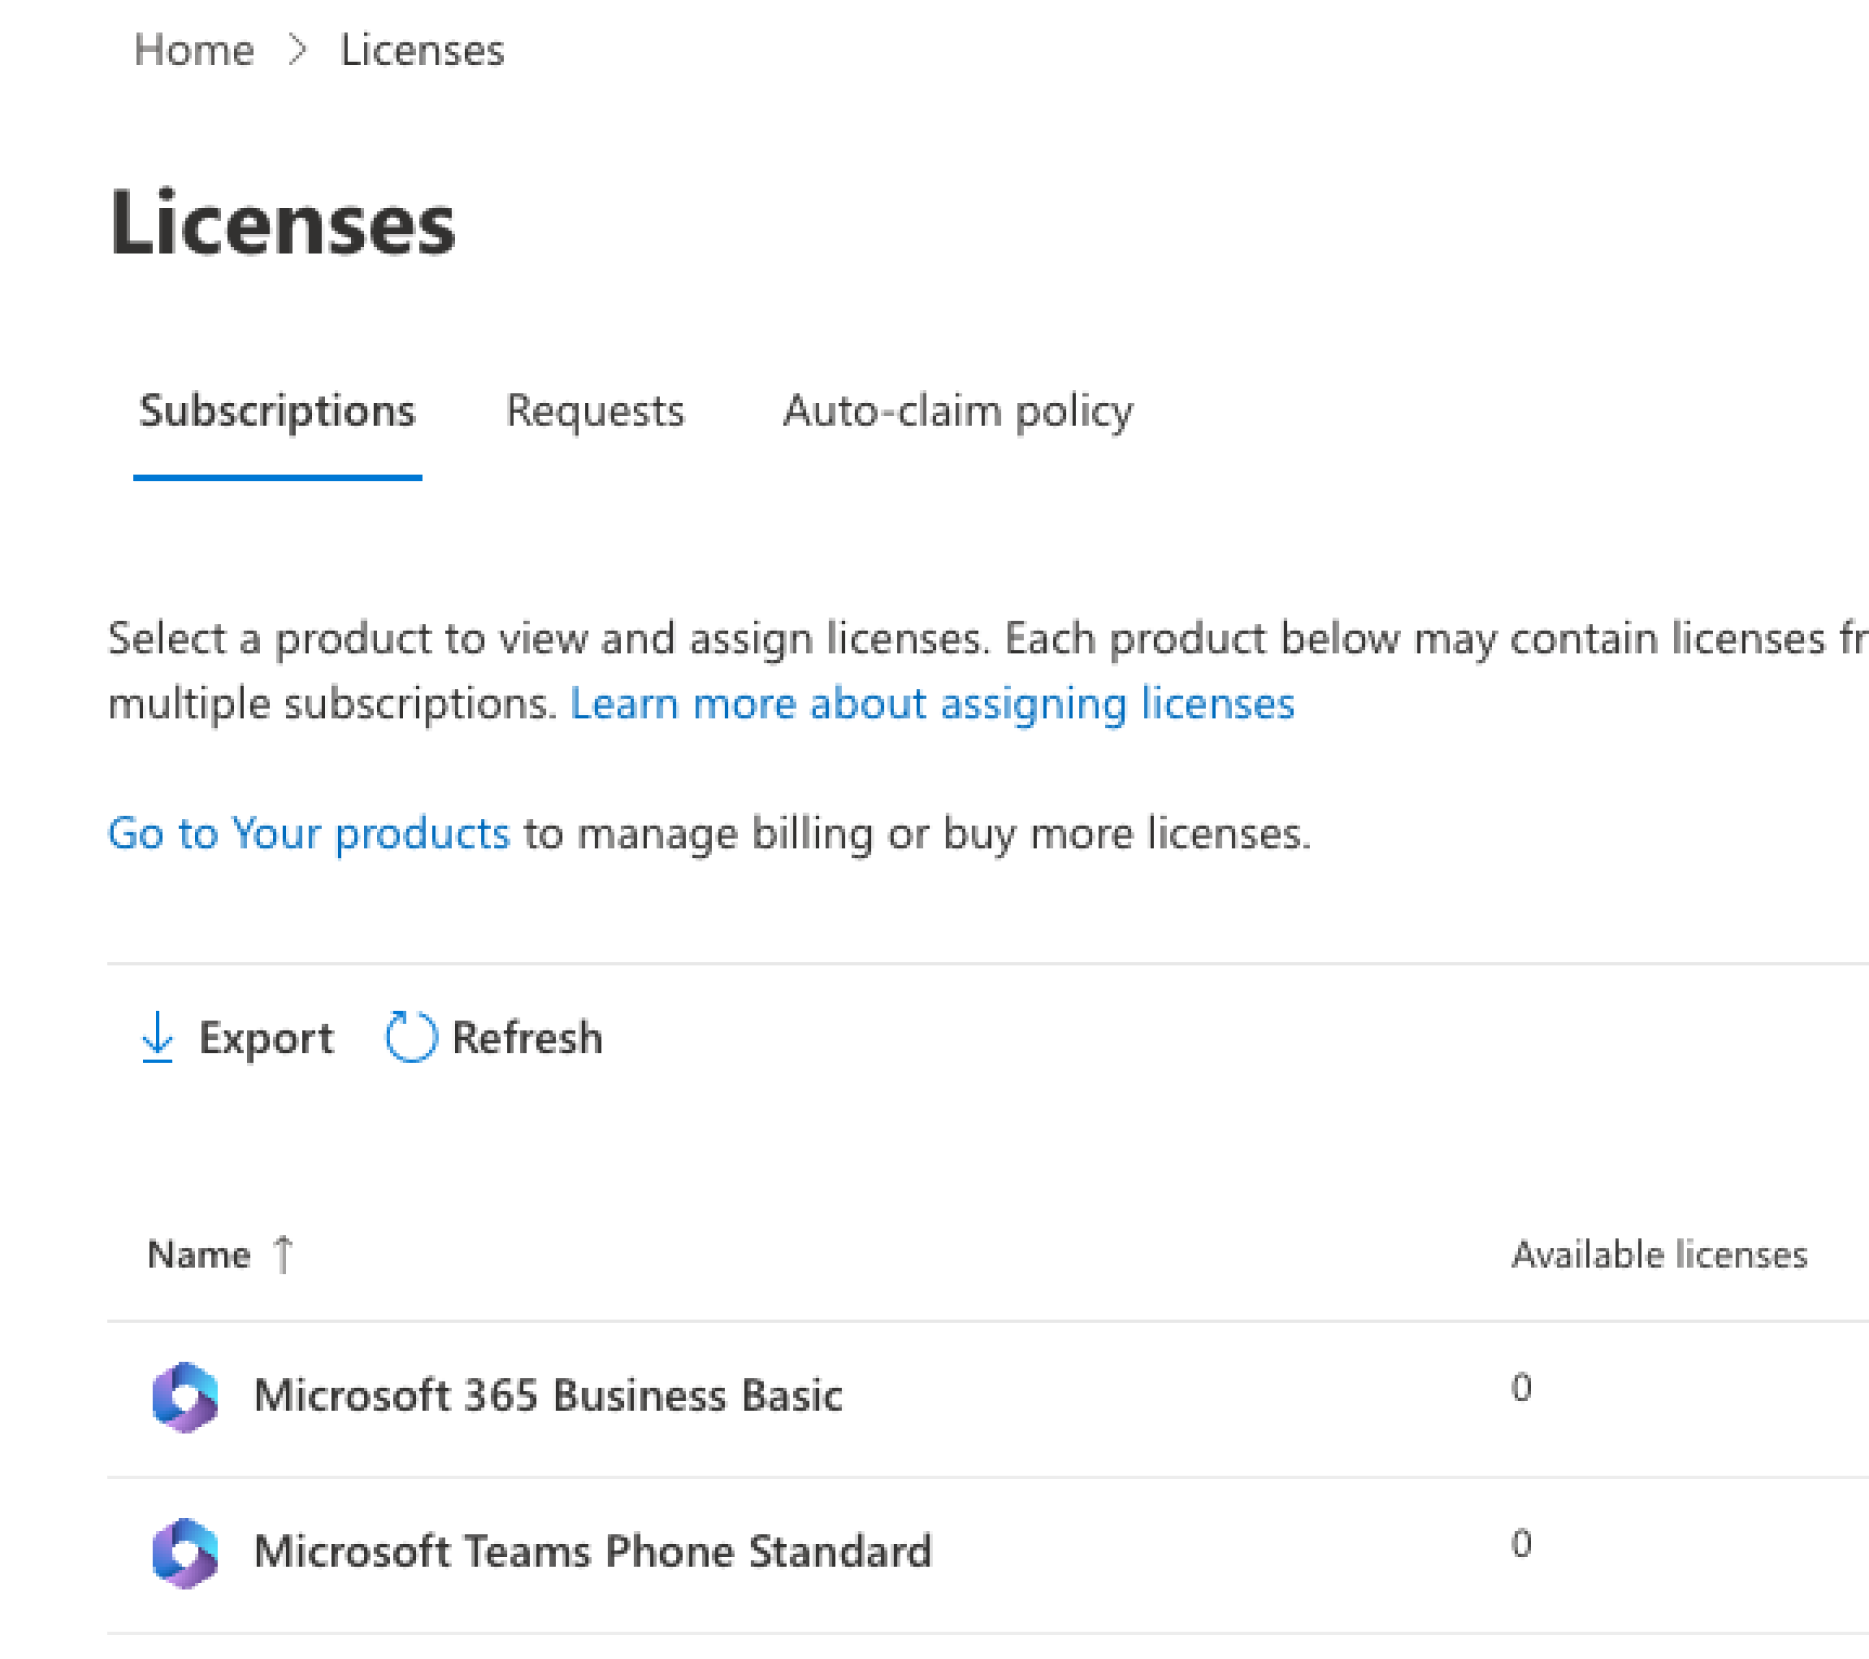
Phone services for Teams require specific licensing for each user:
To set this up:
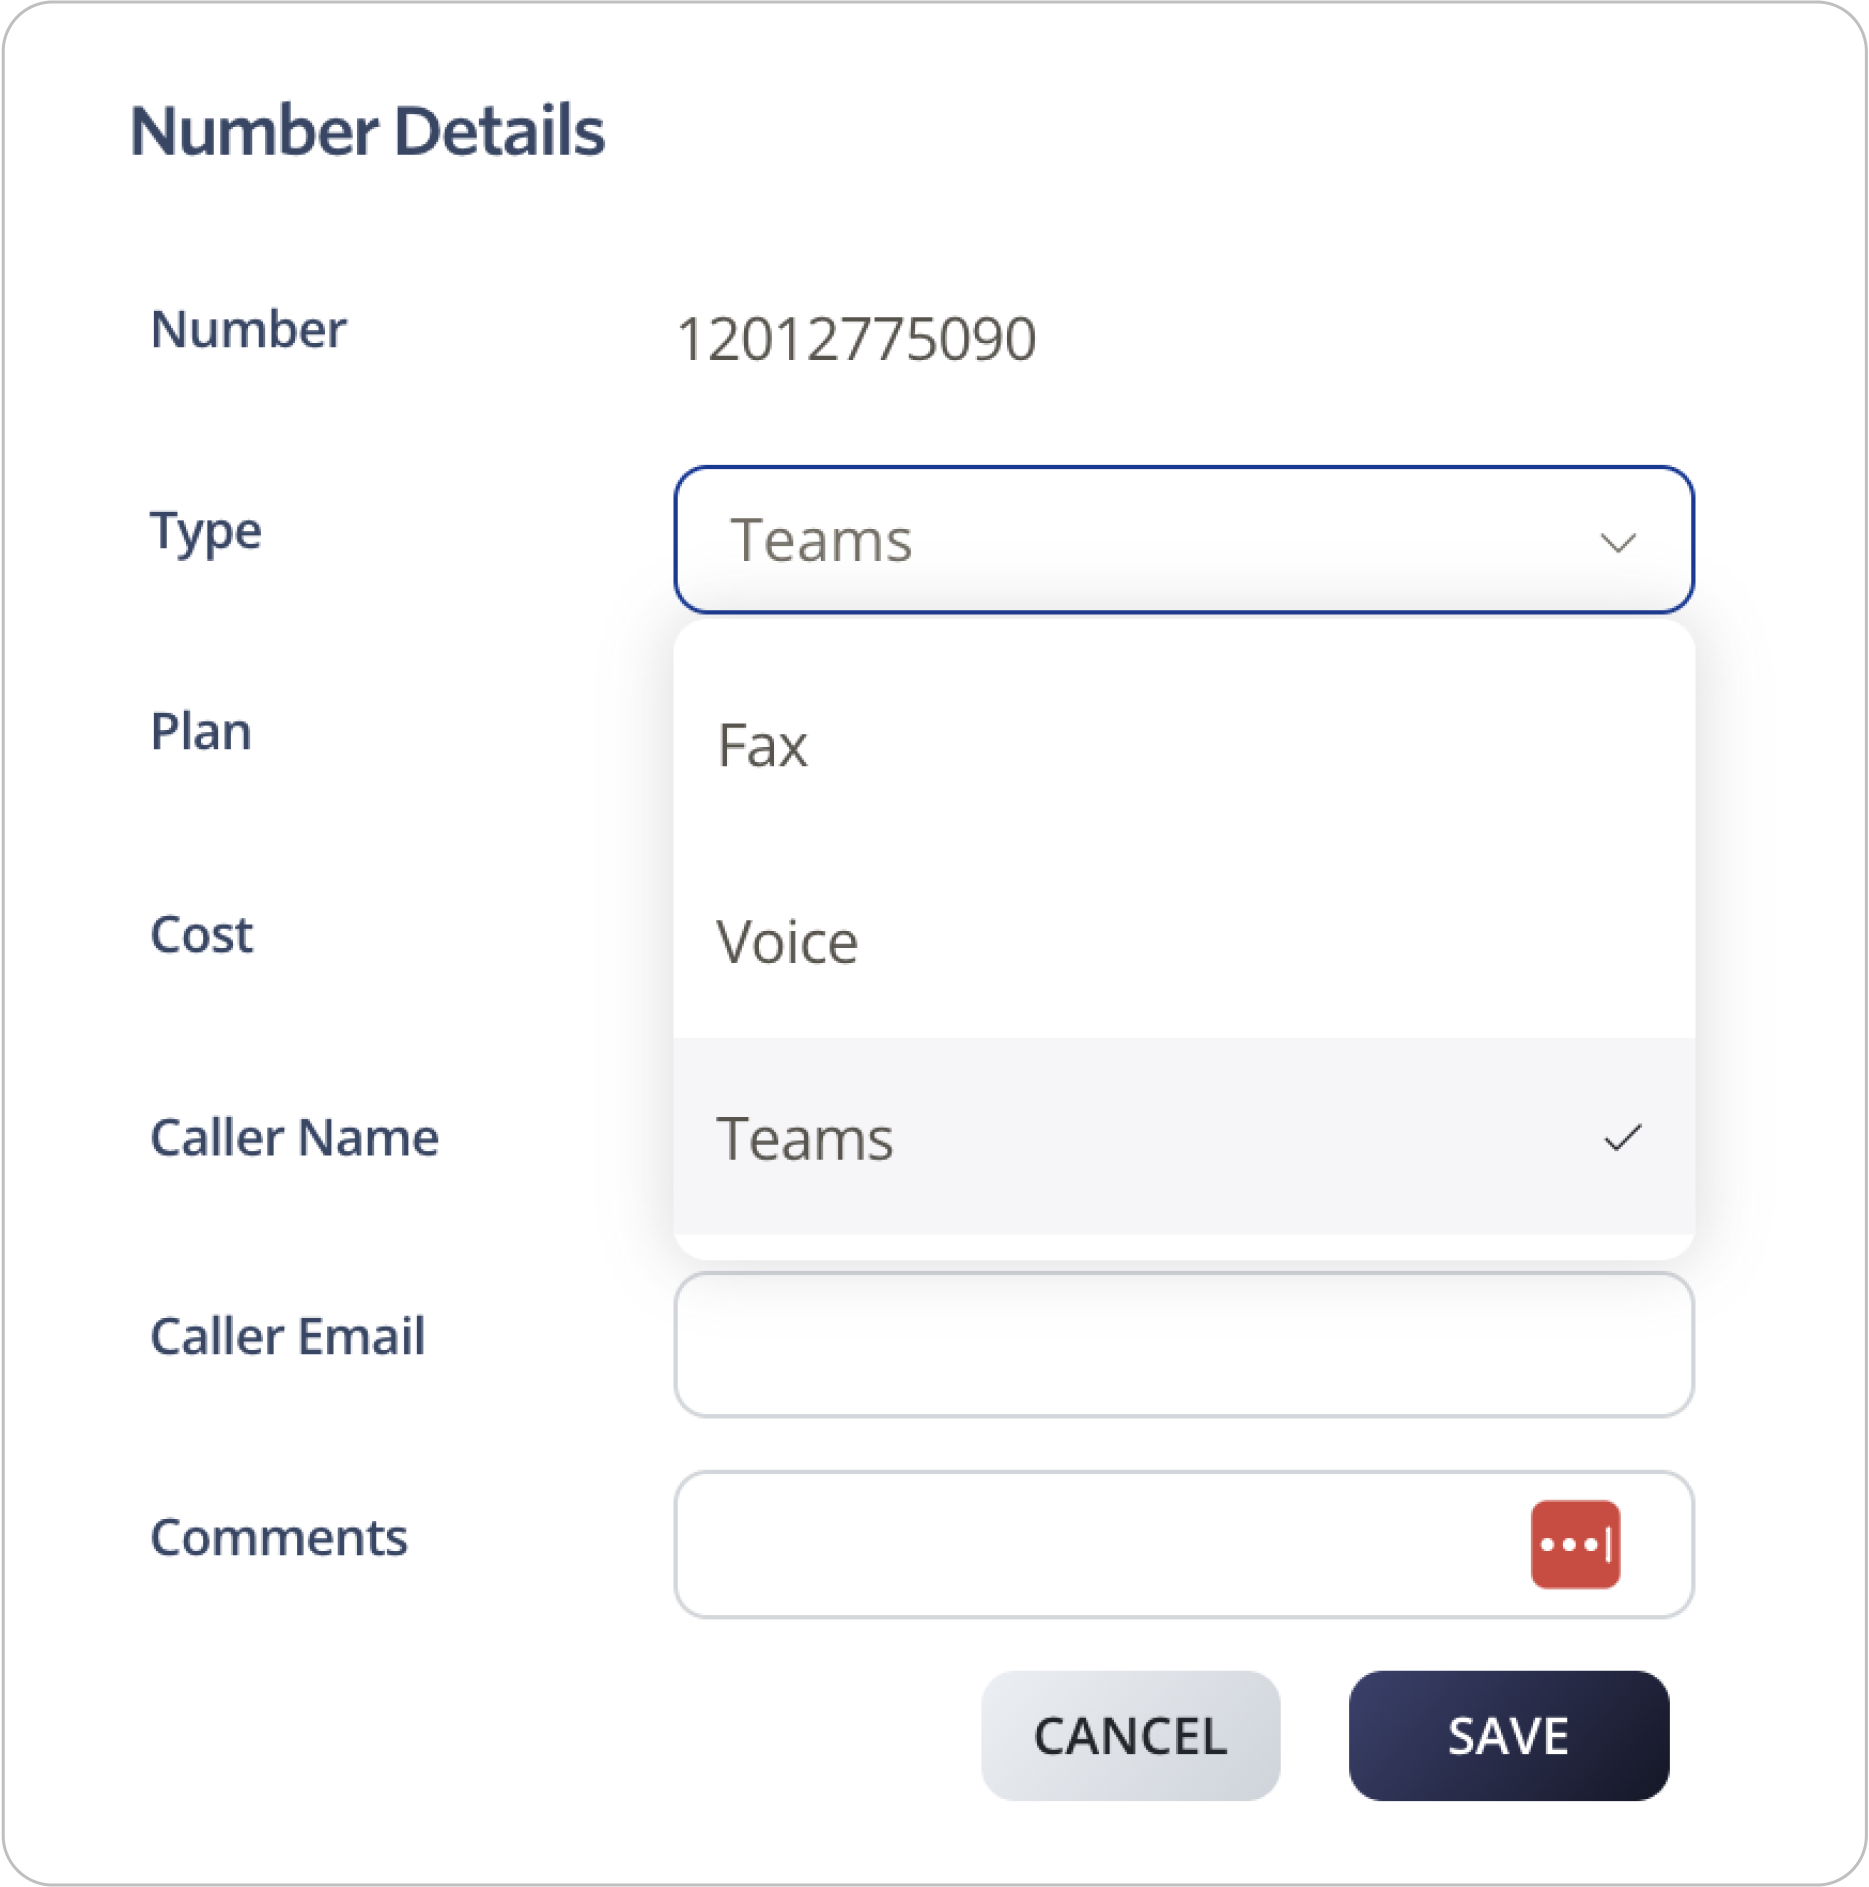
In your SIPcity account, add any new numbers you need. Go to Switchboard, select Add Number, and follow the prompts. See the Adding Numbers article for details.
Use our PowerShell wizard to generate the scripts needed to finalise Direct Routing setup.
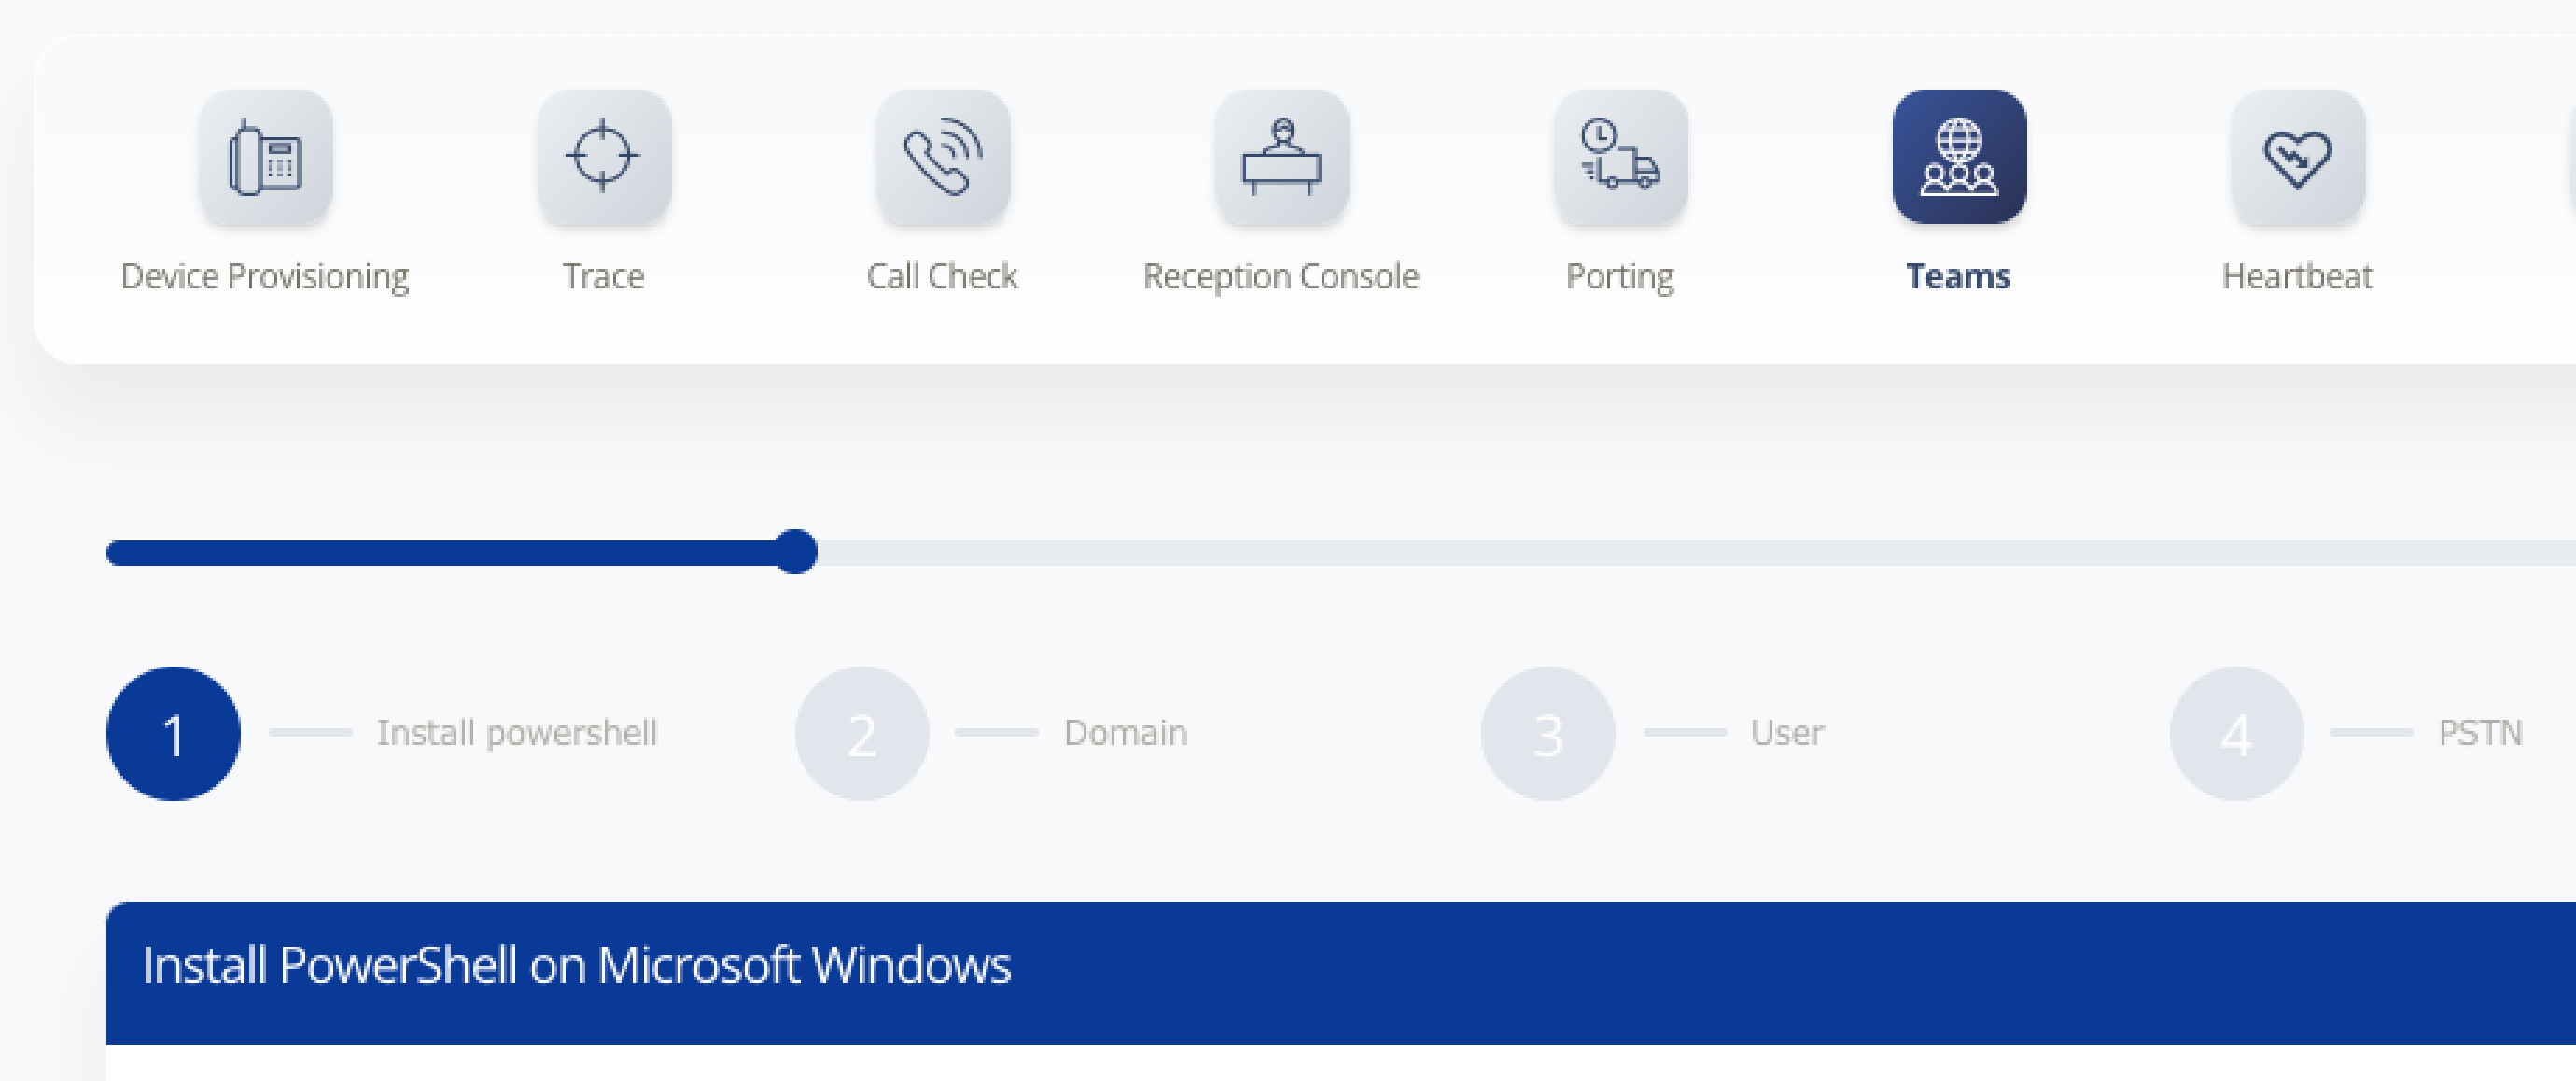
Open PowerShell and connect to your Microsoft 365 tenant.
#: Install-Module Microsoft.Graph
#: Connect-MgGraph -Scopes "User.ReadWrite.All","Domain.ReadWrite.All"
Add a domain using the New-MgDomain cmdlet.
#: New-MgDomain -BodyParameter @{Id="ms50000100.teams.sipcity.com.au";IsDefault="False"}
#: $MgVerificationCode = (Get-MgDomainVerificationDnsRecord -DomainId "ms50000100.teams.sipcity.com.au" | Where-Object {$_.RecordType -eq "Txt"}).AdditionalProperties.text
#: echo $MgVerificationCode
Domain validation TXT record: Microsoft generates this record to validate your domain. Copy and paste it into the Add TXT dialog in your DNS settings.

Confirm the domain with Microsoft:
#: Confirm-MgDomain -DomainId "ms50000100.teams.sipcity.com.au"
Once confirmed, we remove the TXT record from our Cloudflare DNS.
Note: You have a 5-minute window to complete this step. If you can’t finish in time, you can retry later.
We will set up a certificate for you. We will let you know once it’s been created. You can continue with the setup on your side, though your account needs this before the Direct Routing setup can be completed.
[email protected]).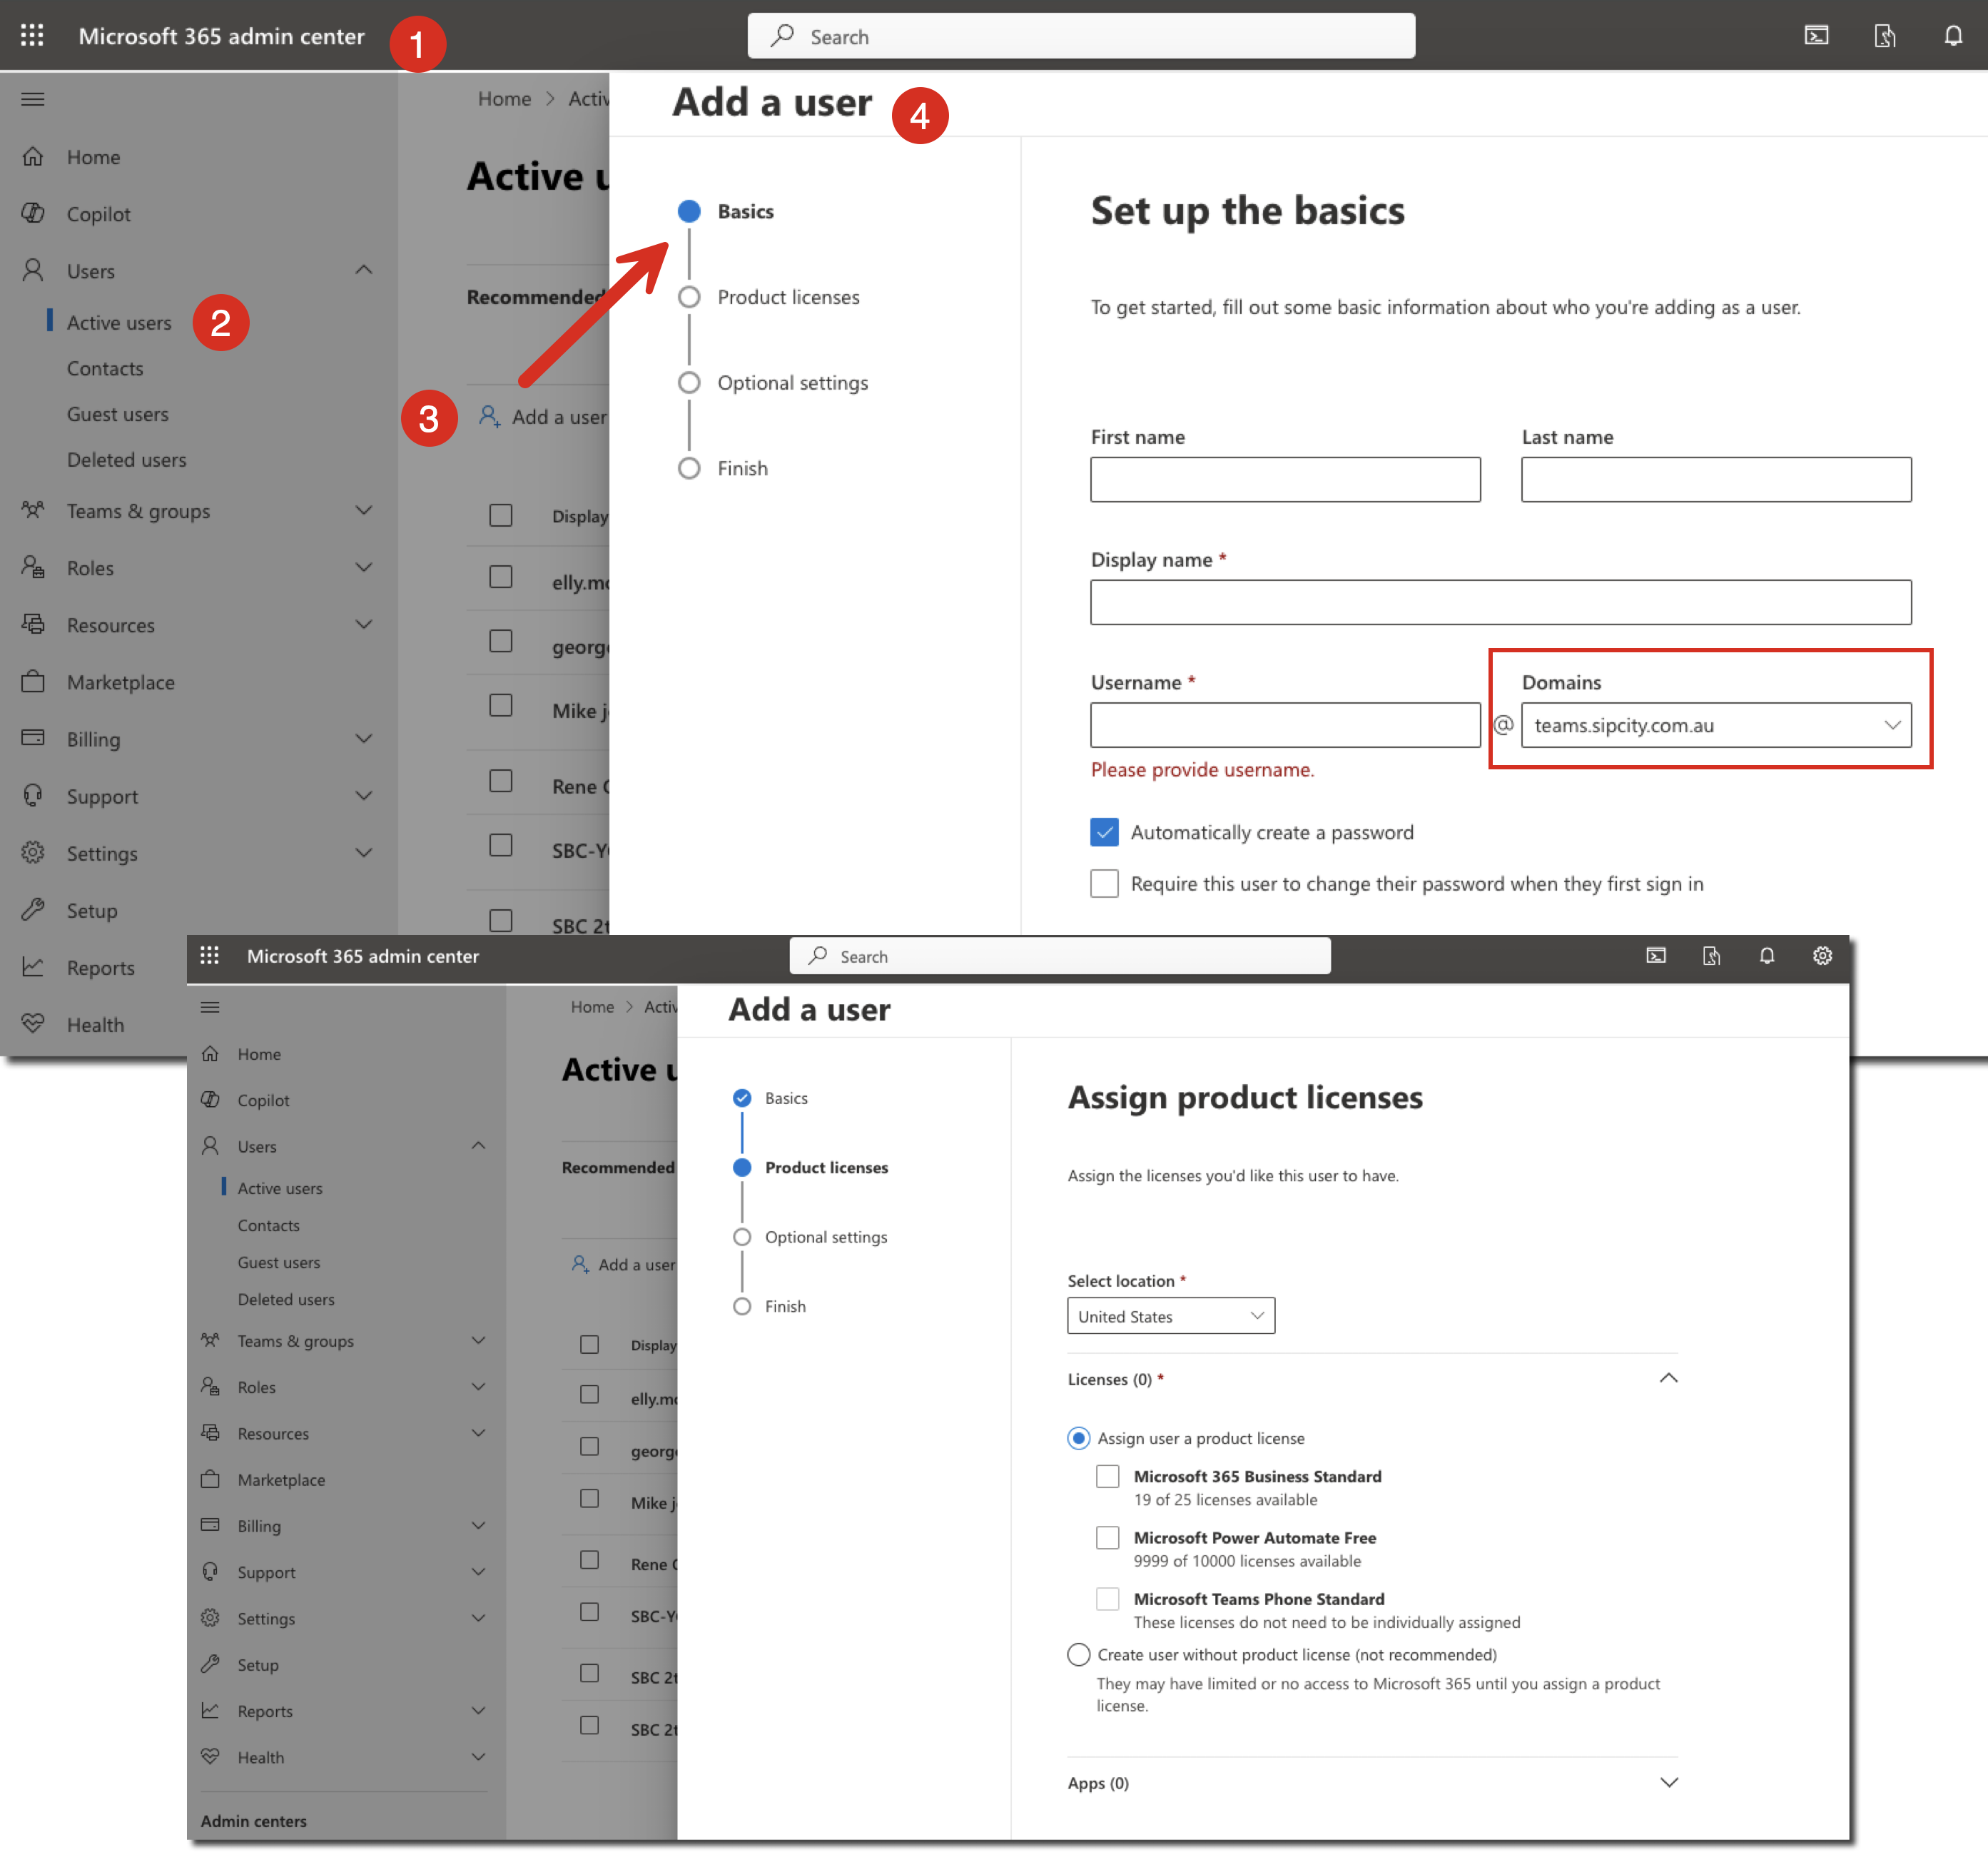
Open PowerShell and connect to your Microsoft 365 tenant.
#: Install-Module Microsoft.Graph
#: Connect-MgGraph -Scopes "User.ReadWrite.All","Domain.ReadWrite.All"
Use the New-CsOnlinePSTNGateway cmdlet to create a PSTN gateway with the required settings.
#: New-CsOnlinePSTNGateway -FQDN ms50000100.teams.sipcity.com.au -SIPSignalingPort 5061 -MaxConcurrentSessions 100 -Enabled $true
Check that the gateway was created successfully.
#: Get-CsOnlinePSTNGateway
Open PowerShell and connect to your Microsoft 365 tenant.
#: Install-Module Microsoft.Graph
#: Connect-MgGraph -Scopes "User.ReadWrite.All","Domain.ReadWrite.All"
Set up PSTN identity and voice route details.
#: Set-CsOnlinePstnUsage -Identity Global -Usage @{Add="VOIP"}
#: New-CsOnlineVoiceRoute -Identity "VOIP" -NumberPattern ".*" -OnlinePstnGatewayList "ms50000400.teams.sipcity.com.au" -Priority 1 -OnlinePstnUsages "VOIP"
#: New-CsOnlineVoiceRoutingPolicy -Identity "VOIP" -OnlinePstnUsages "VOIP"
If you have multiple users, assign a phone number to each Teams user. The example below assigns +61 (2) 5550 0000 to [email protected] with the Identity set to “VOIP”. Replace as needed for your users.
#: Set-CsPhoneNumberAssignment -Identity [email protected] -PhoneNumber +61255500000 -PhoneNumberType DirectRouting
#: Grant-CsTeamsCallingPolicy -PolicyName AllowCalling -Identity [email protected]
#: Grant-CsOnlineVoiceRoutingPolicy -Identity [email protected] -PolicyName "VOIP"
#: Set-CsOnlineVoicemailUserSettings -Identity [email protected] -VoicemailEnabled $false
Optionally, disconnect your PowerShell session.
#: Disconnect-MicrosoftTeams
Your SIPcity account is now fully set up and connected to your Microsoft 365 account.
If you want to add additional users after the set-up is first completed, this can be done.
Microsoft Teams, Microsoft Windows, and PowerShell are trademarks or registered trademarks of Microsoft Corporation in the US and other countries. macOS is a registered trademark of Apple Inc.