AI Voice Agent
Never miss another call.
Learn more

AI Voice Agent
Never miss another call.
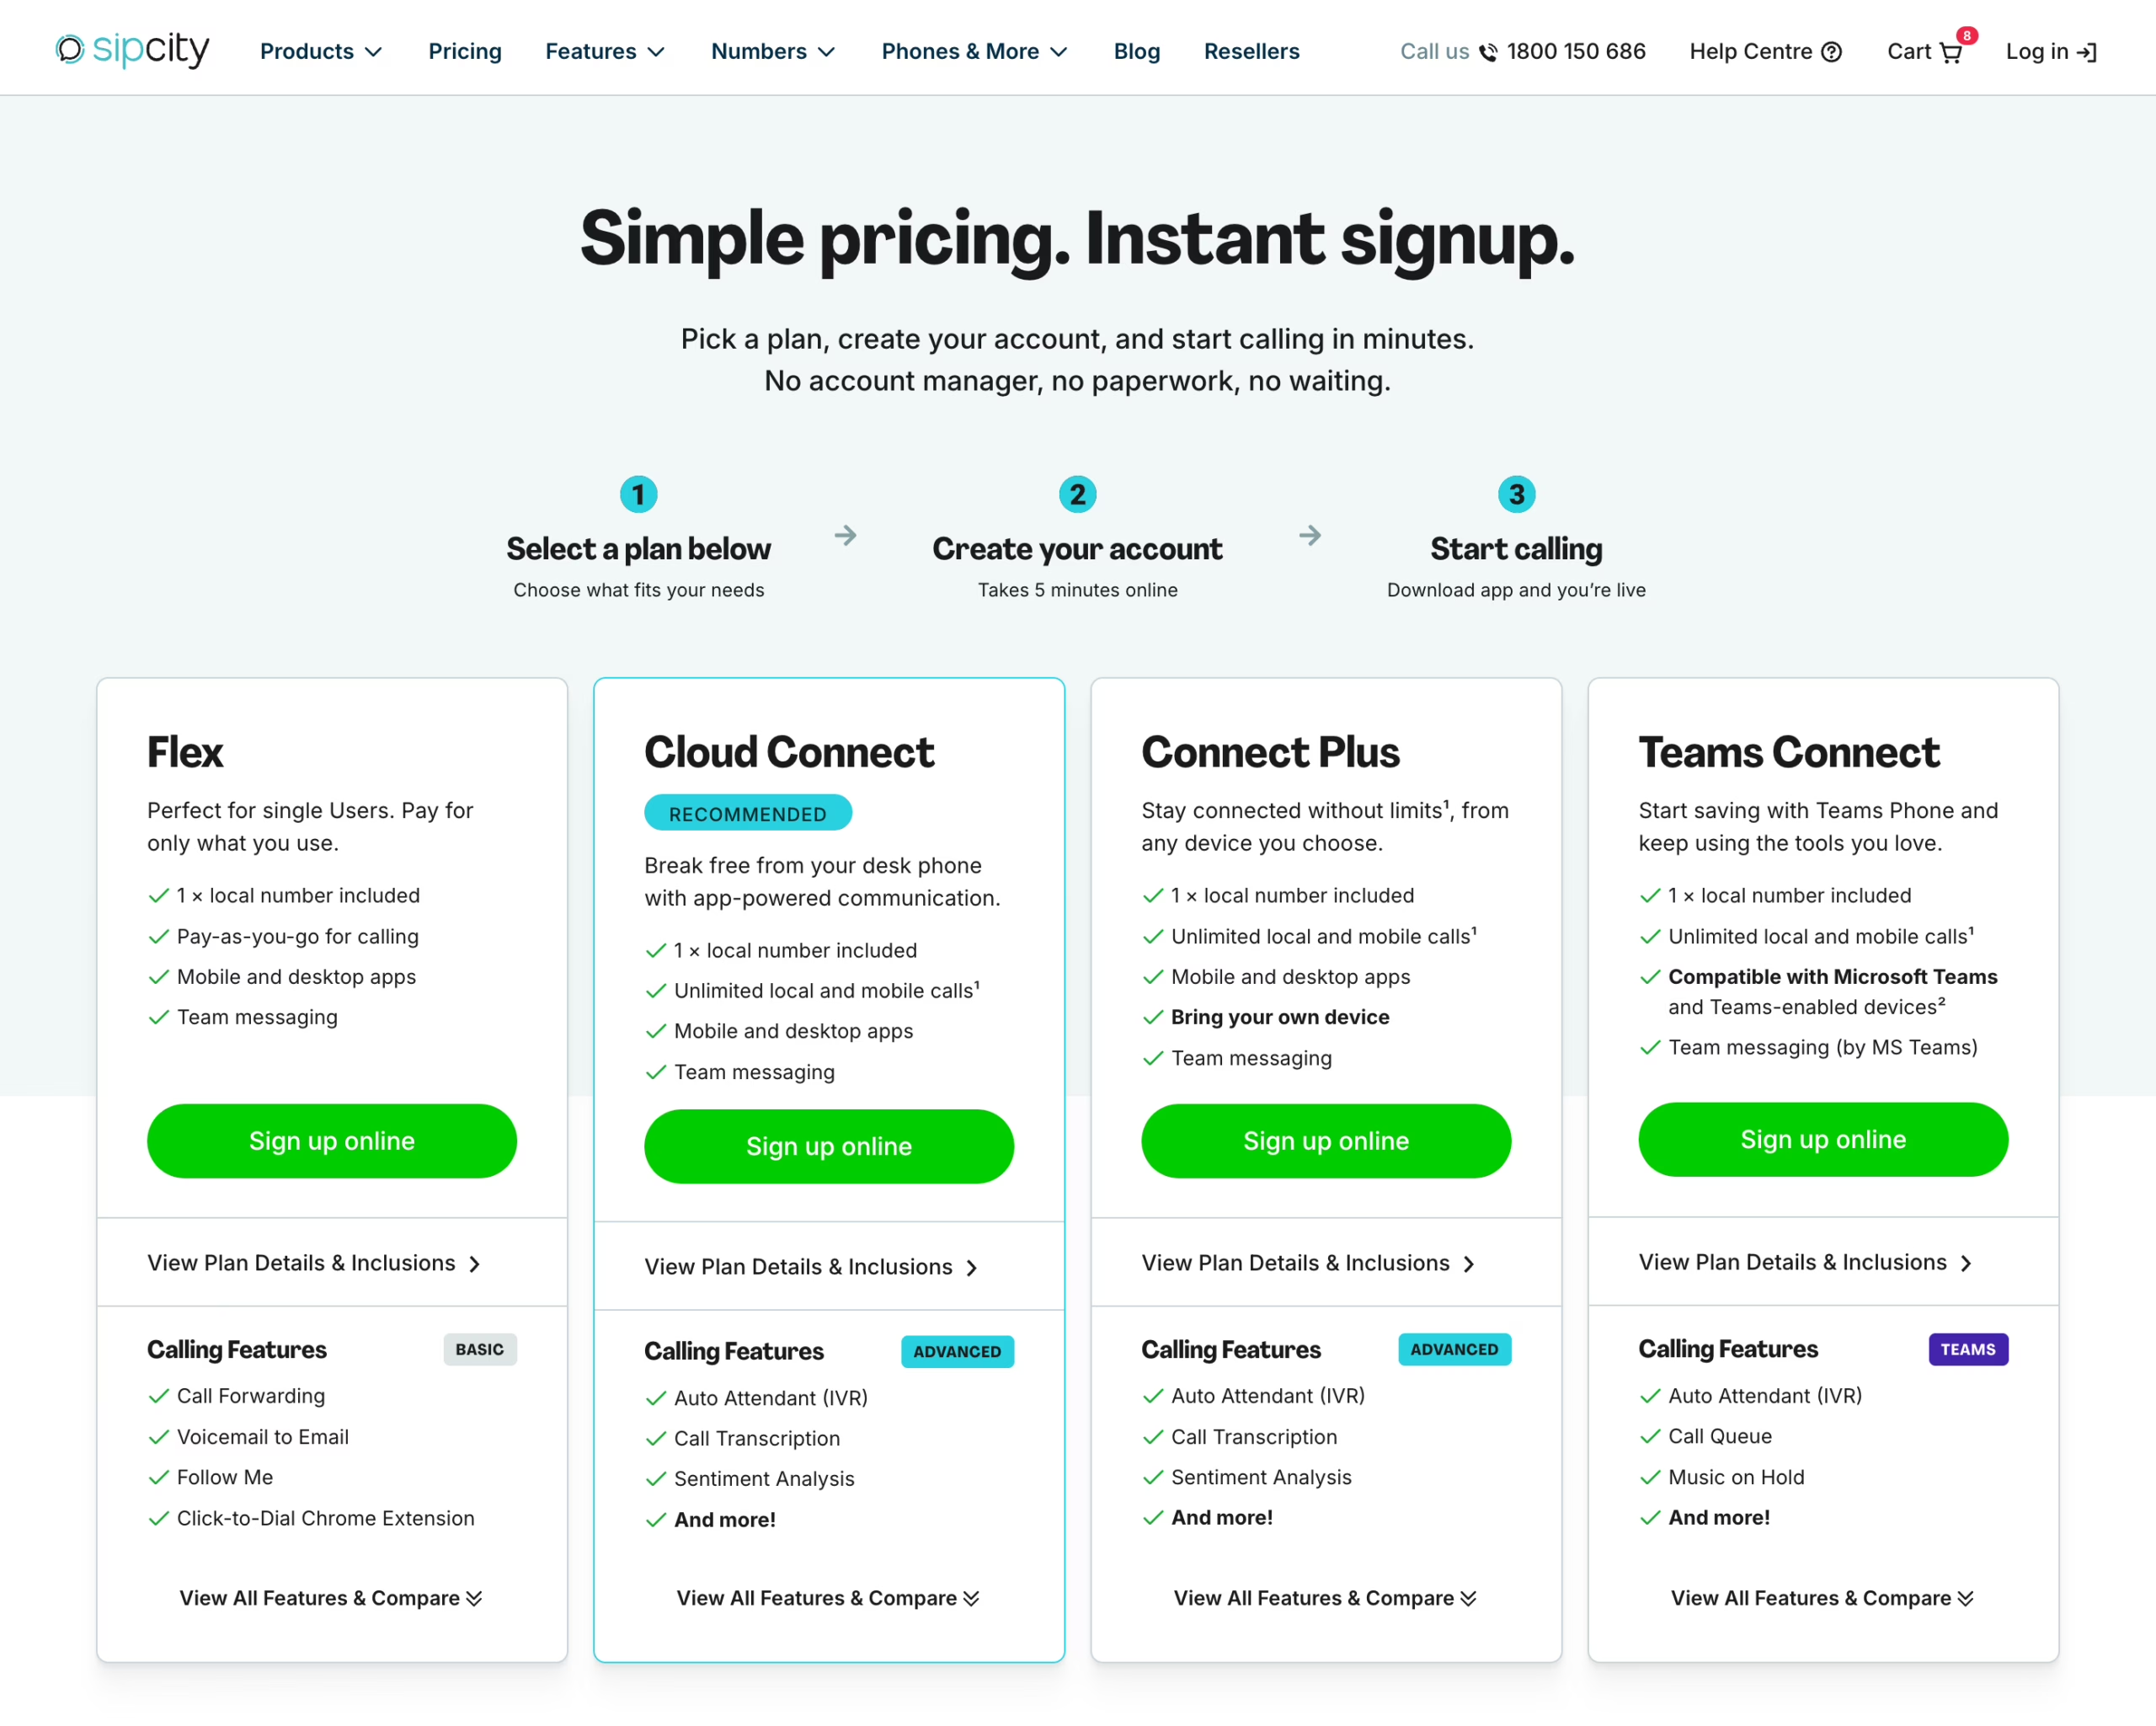
Signing up for SIPcity is fast and secure. You’ll verify your identity, enter your business and account details, choose a number, confirm your plan, and pay. This guide walks you through each step.
You’ll need to choose a plan before you begin. Visit the Plans & Pricing page and click Sign up online on the plan you want. You can also start from the Plan Details & Inclusions page for each plan using its Sign Up button.
Once you’ve started signing up, you can’t change the selected plan without returning to the Plans & Pricing page and starting again, so make sure you’ve picked the right one.
The signup starts by confirming who you are. SIPcity has partnered with ConnectID, an identity exchange accredited by the Australian Government, to verify your personal information. This helps prevent fraud and unauthorised account creation.
A few things worth knowing:
The details requested are your full name, confirmation you’re over 18, and where available, your email, phone number, and address.
This step must be completed by the person whose identity is being verified — this is the authorised contact for the business.
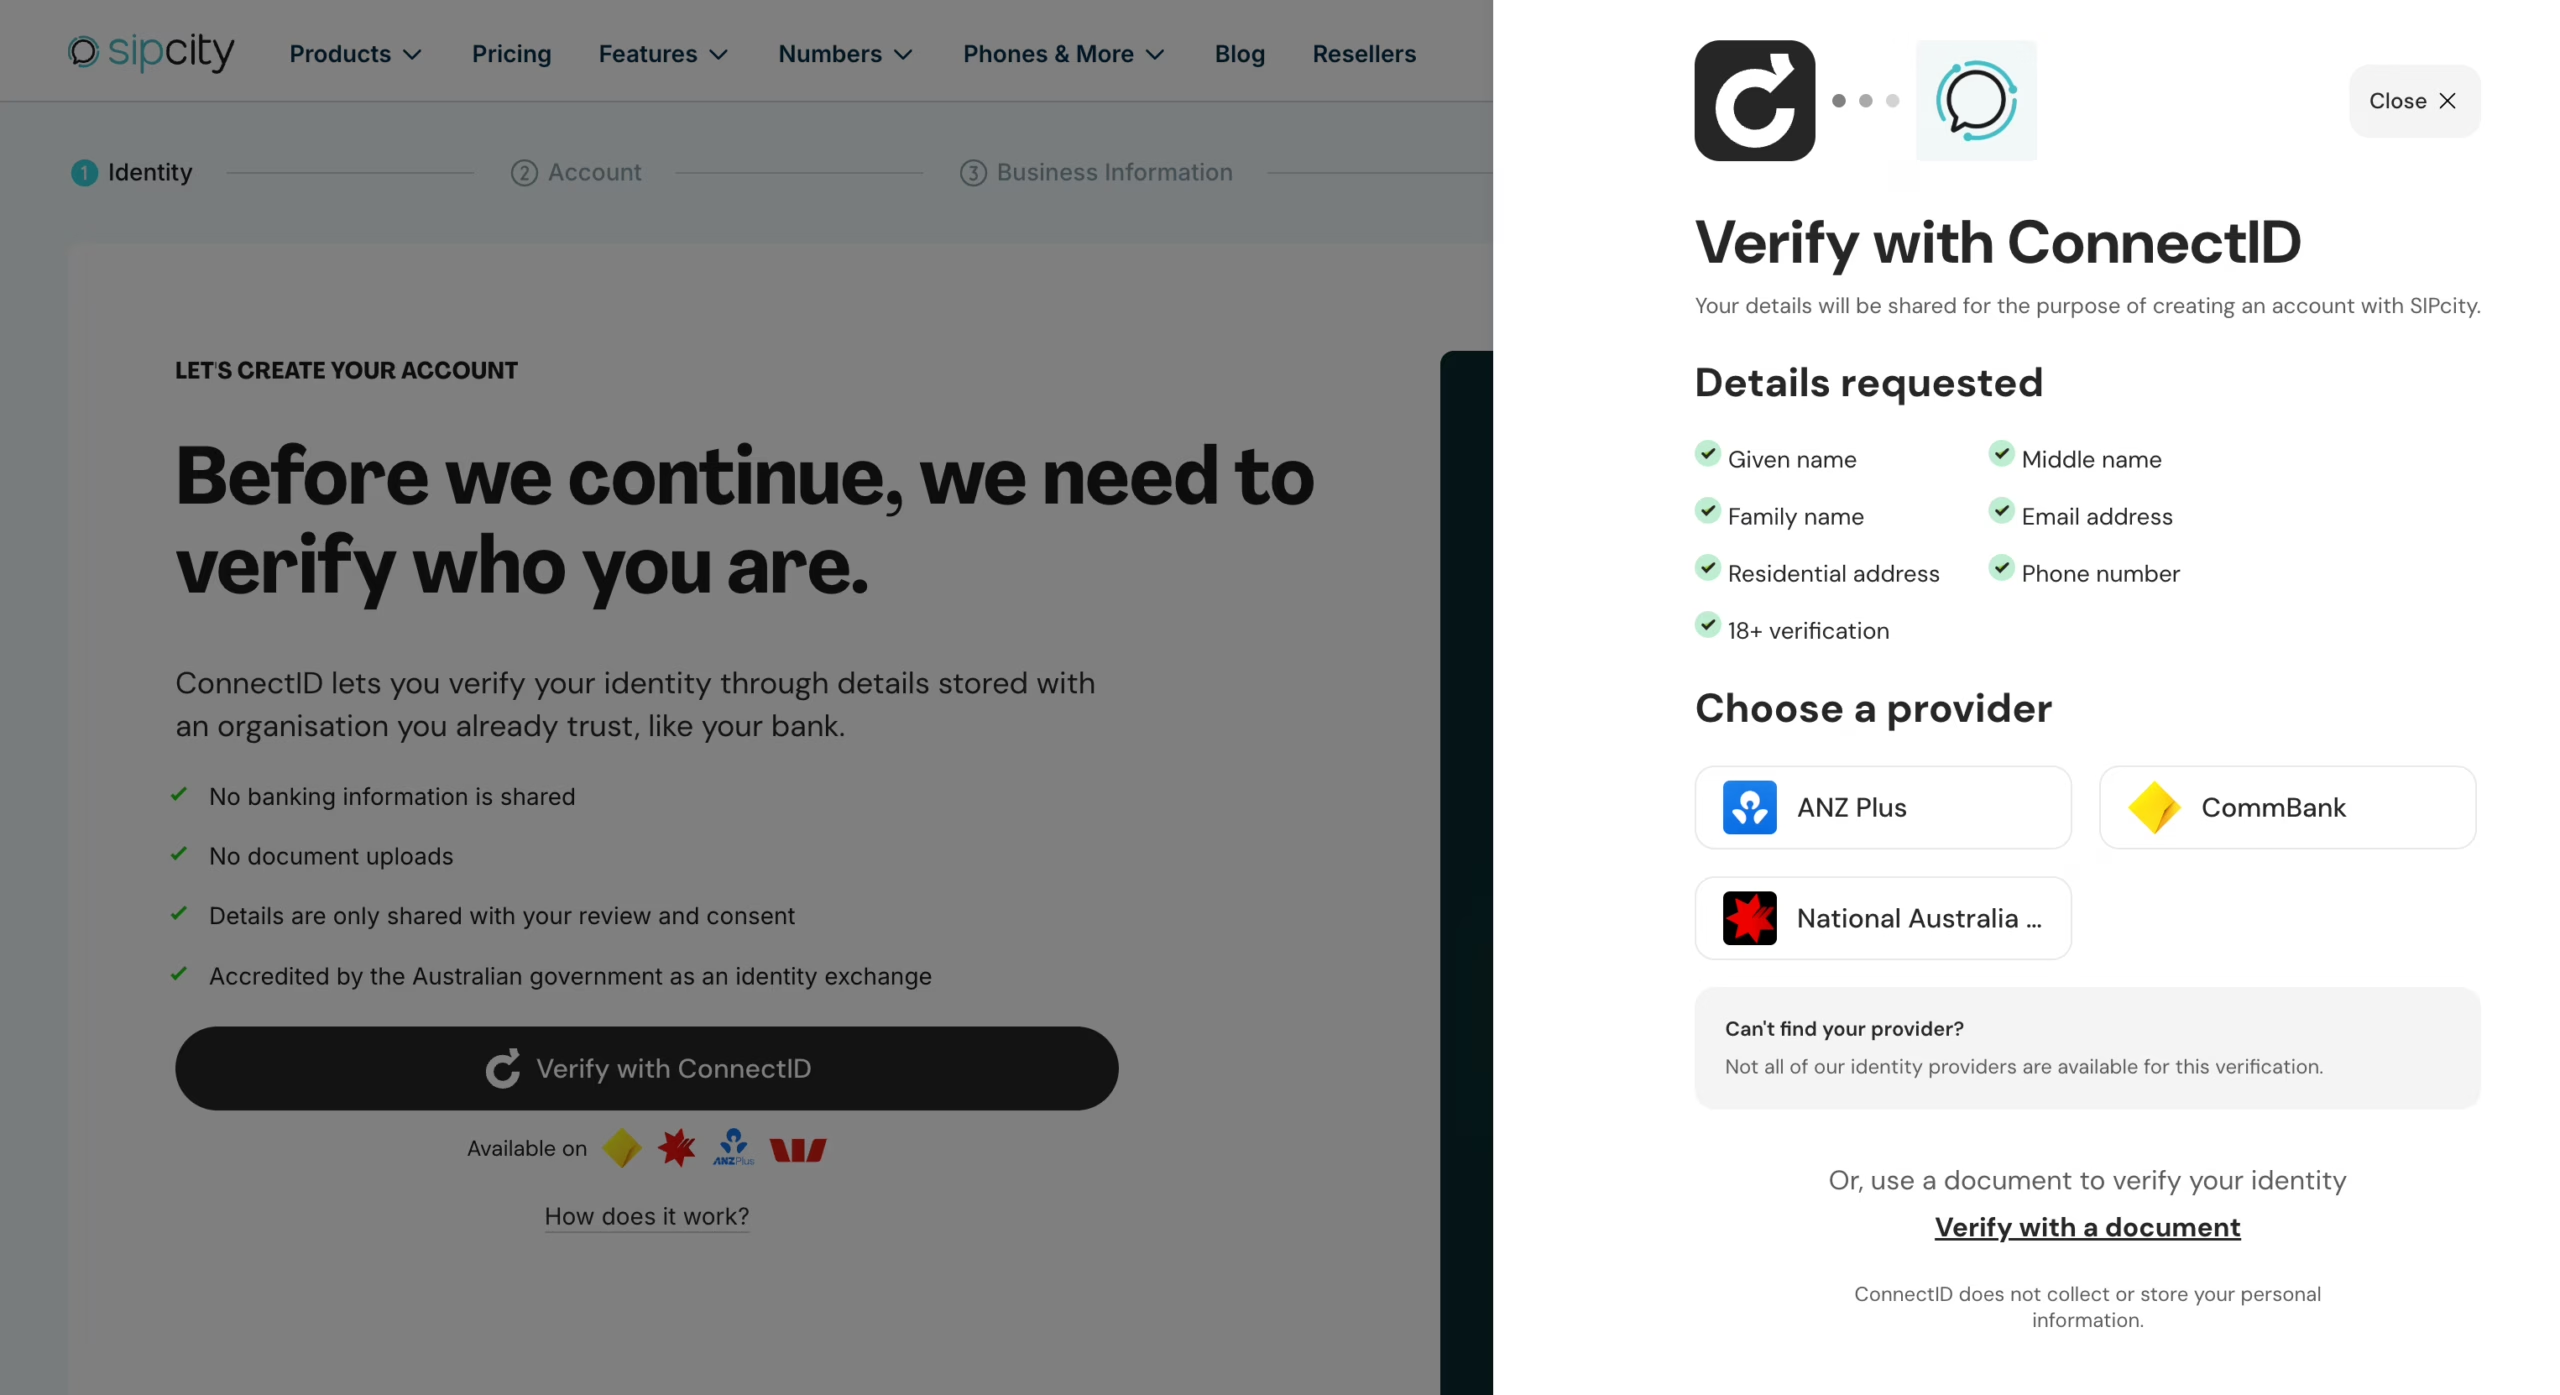
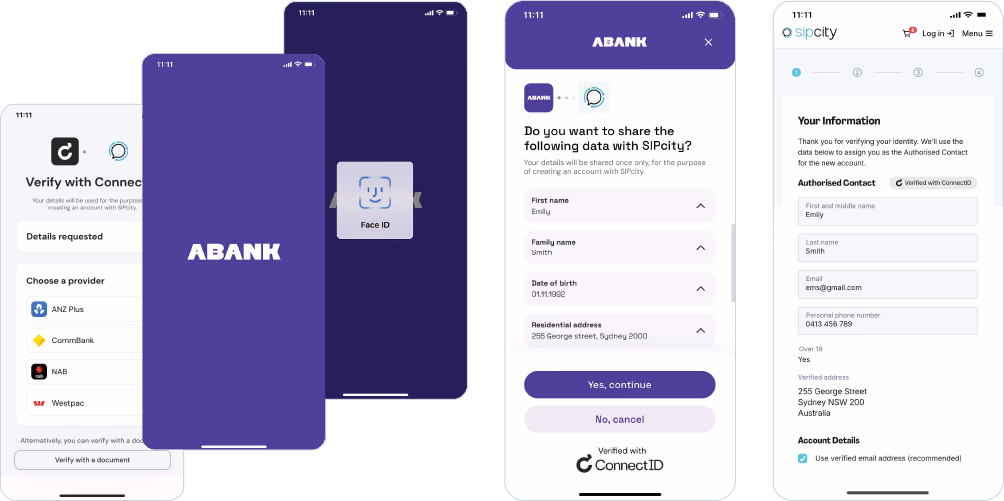
To verify:
If some information can’t be established from the identity check, your account activation may be subject to additional verification.
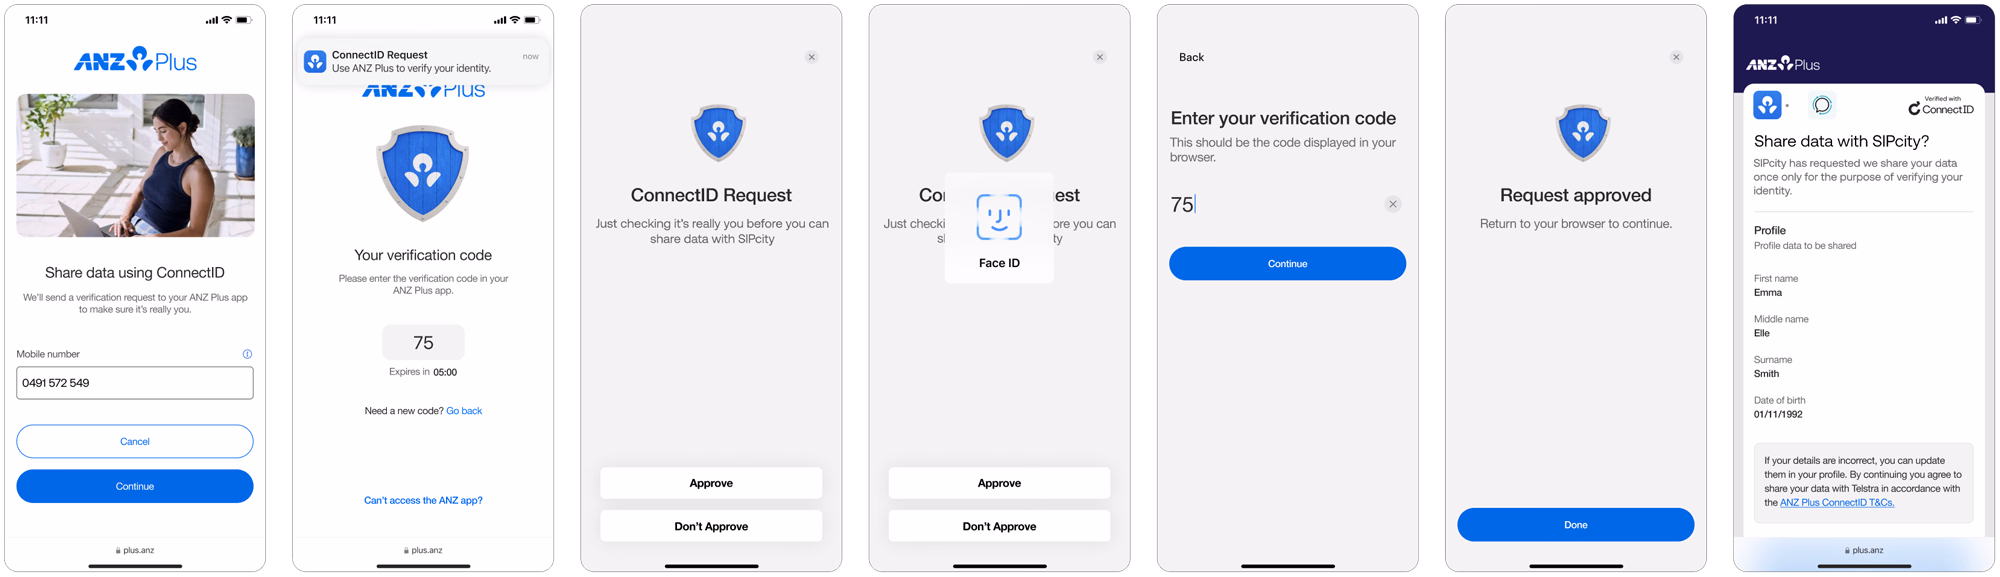
If you bank with ANZ Plus, the verification flow has a few extra steps and requires the ANZ Plus mobile app, even if you’re doing this from your computer. Follow these carefully — missing the final step is the most common reason ANZ Plus customers don’t finish:
Important: After approving in the ANZ Plus app, you must switch back to your browser yourself to give final consent – on your computer if that’s where you started, or in your phone’s browser app if you’re signing up from your phone. Verification isn’t complete until you do this in the browser.
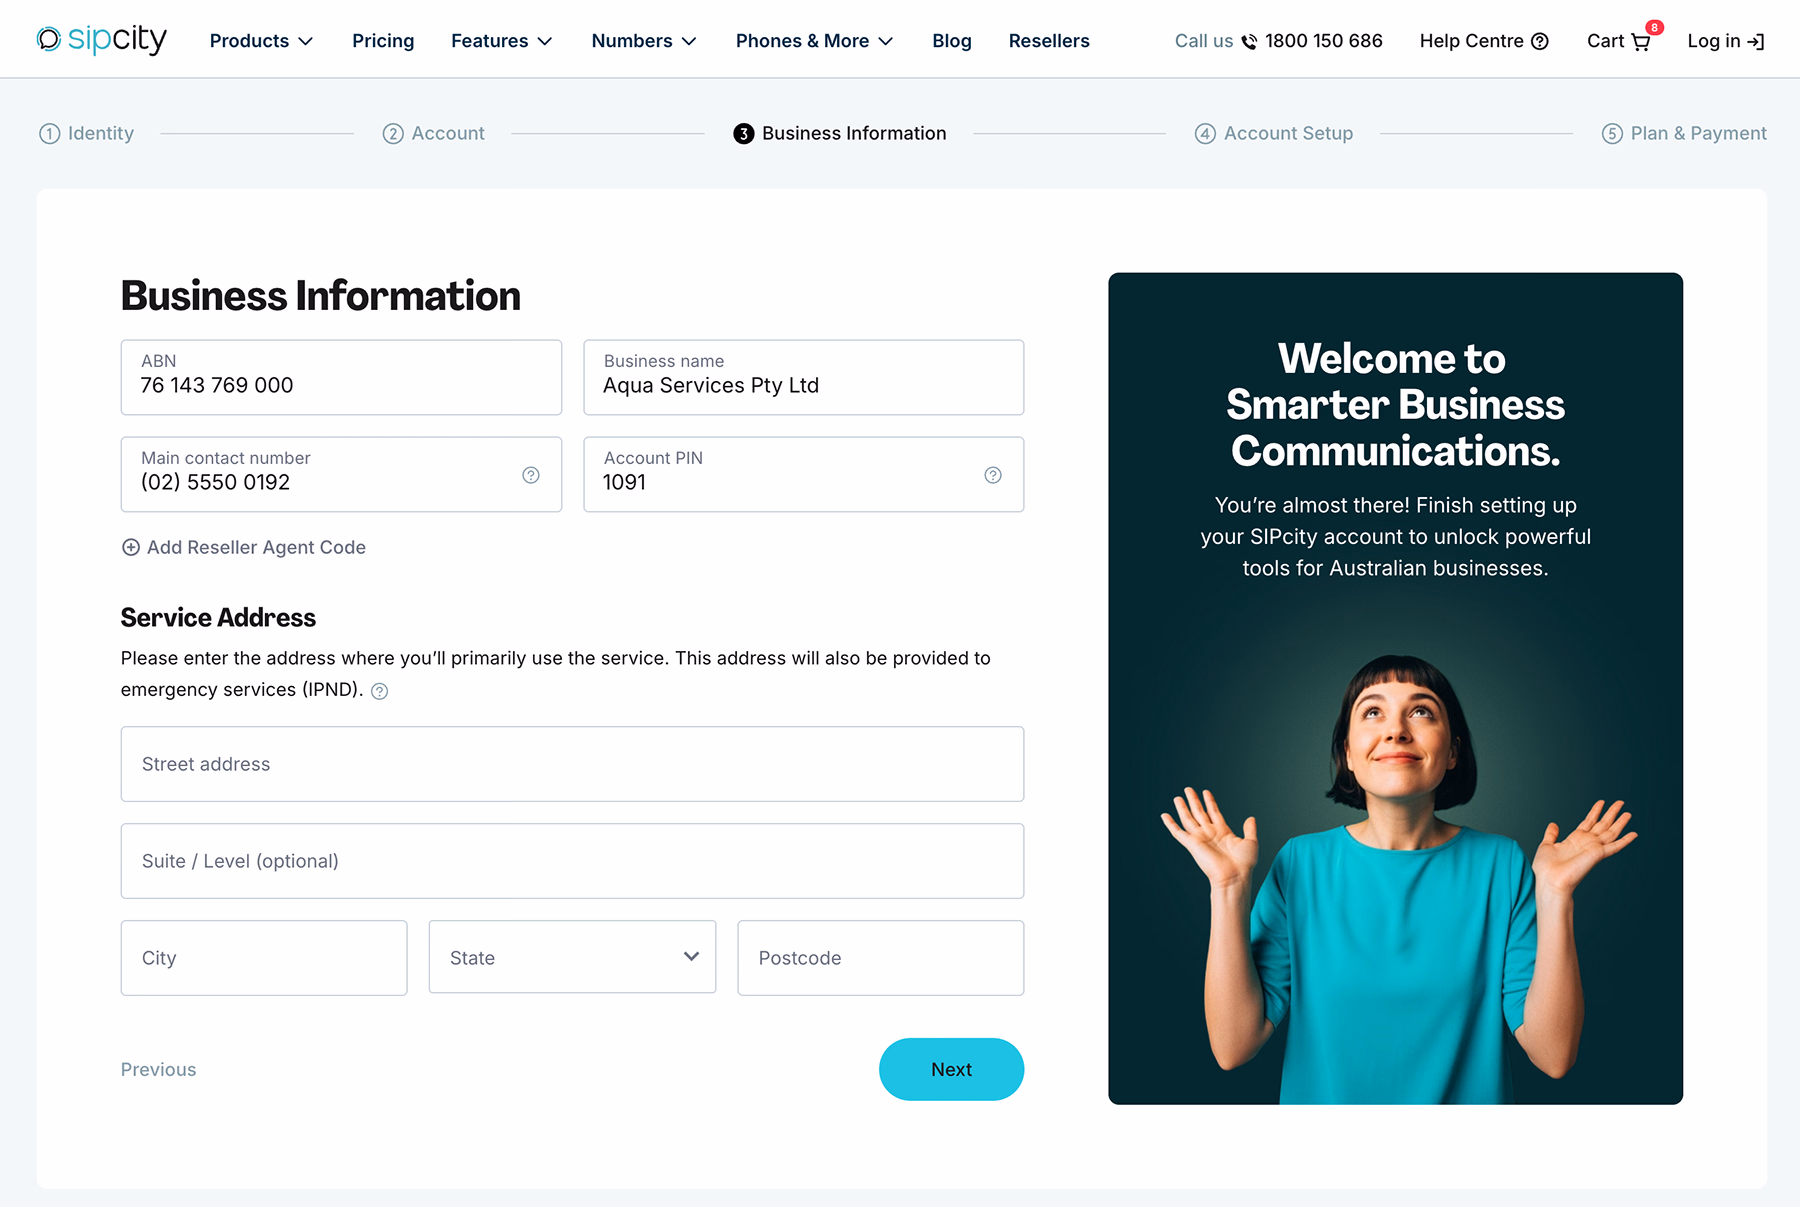
Once your identity is verified, you’ll enter the core account information:
Take your time here. Accurate business details, service address, and contact information help avoid delays when your account is provisioned. Make sure your login email will be accessible long-term, and that your password and Account PIN are something you won’t forget.
![]()
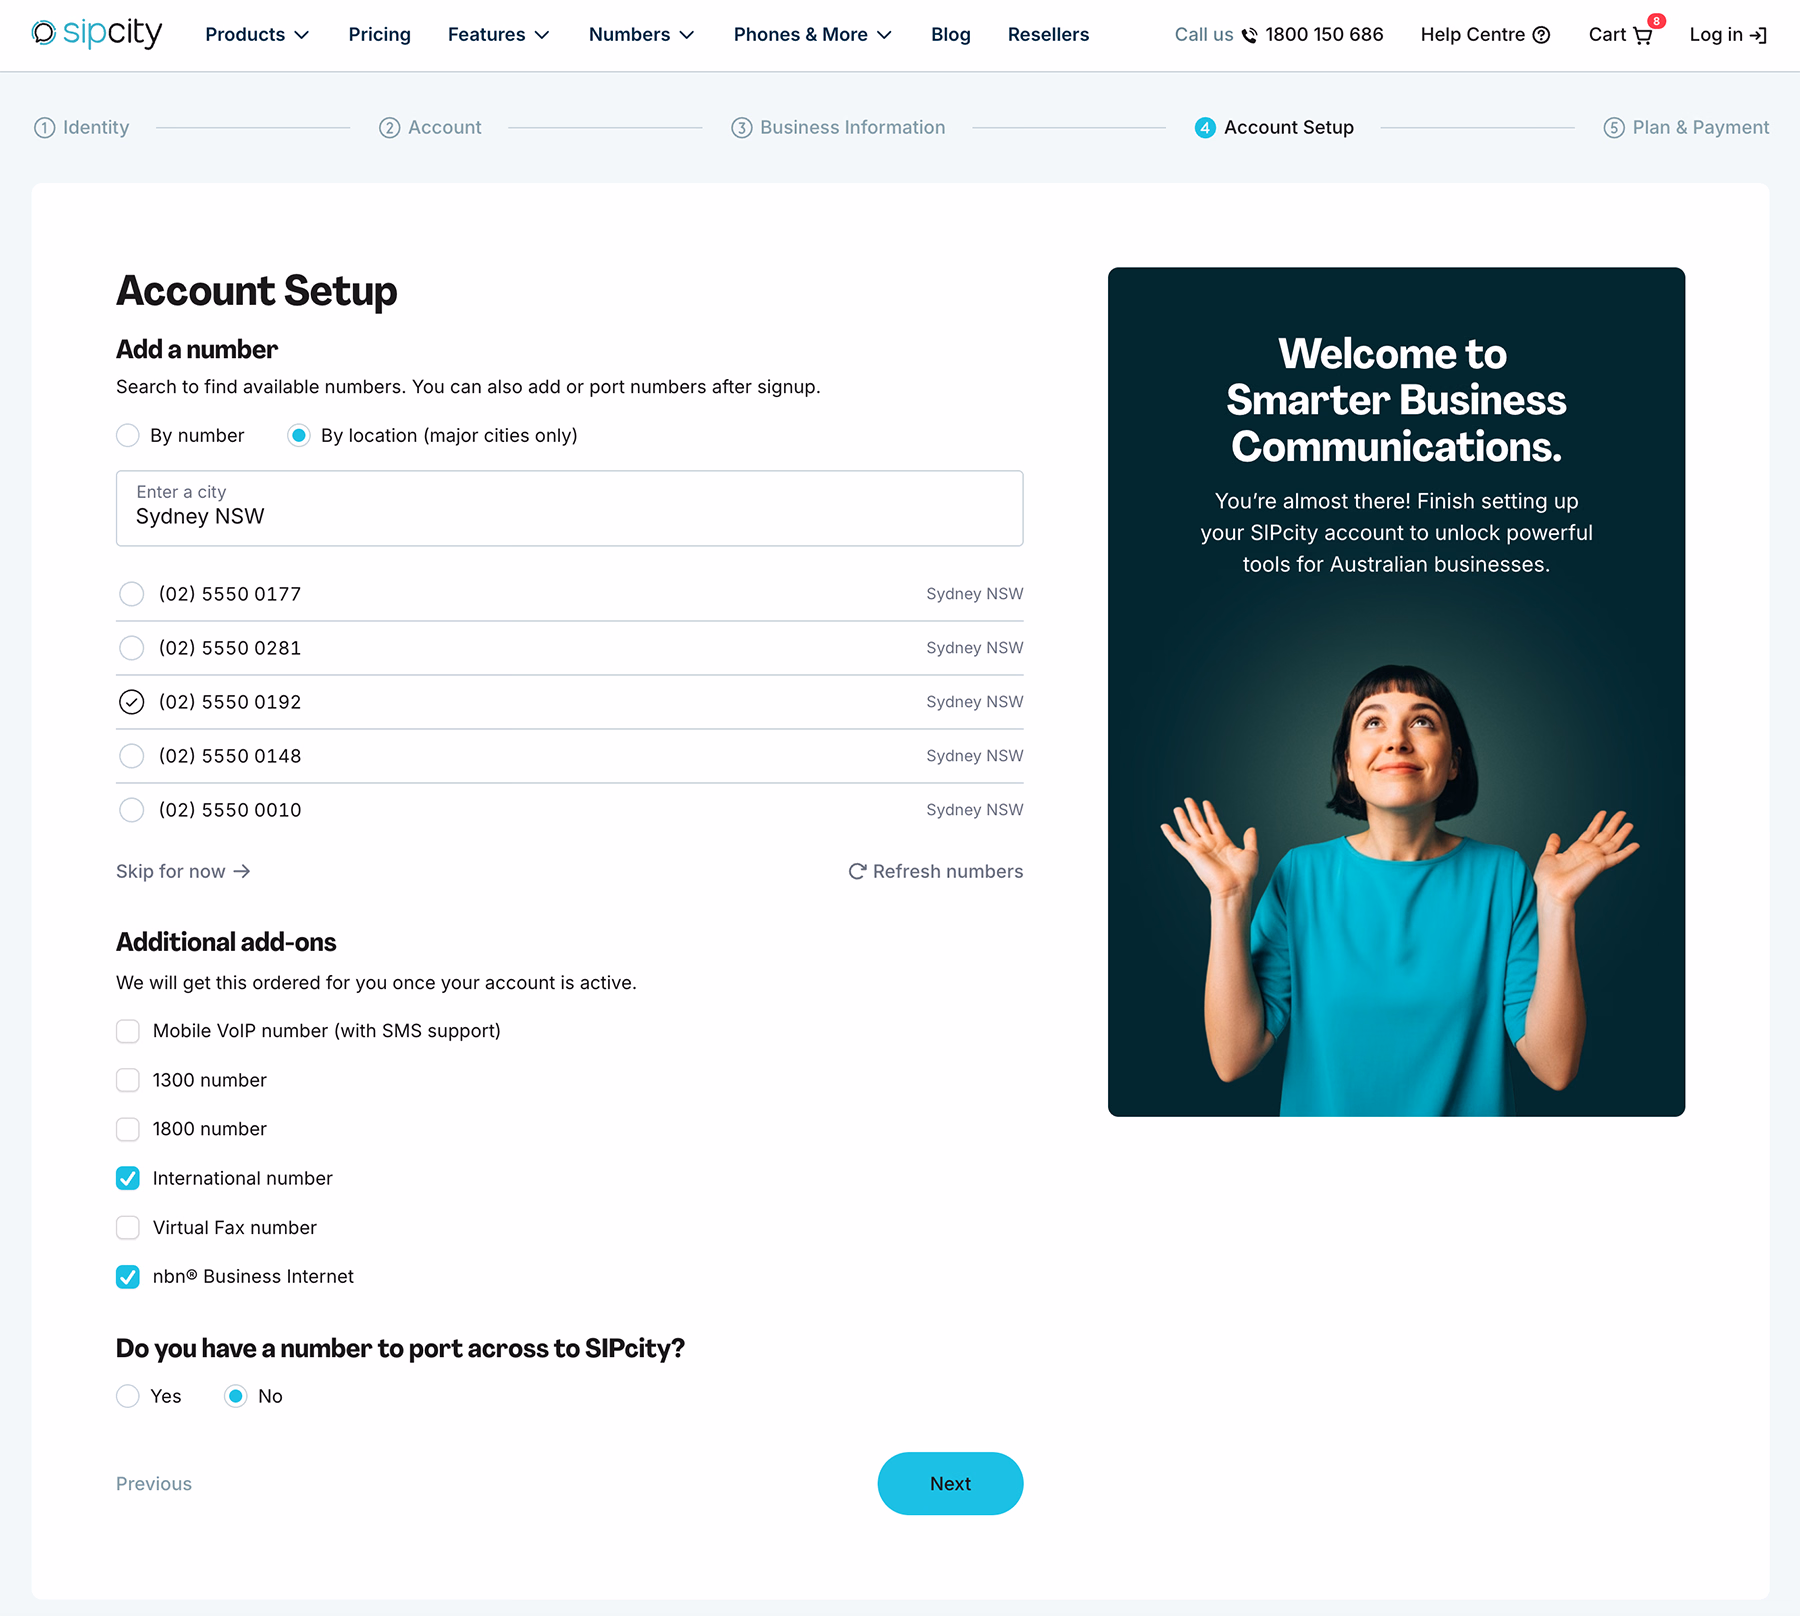
During signup you can choose a local number for your account, which you can use as soon as the account is activated. You can search:
Choosing a number is optional. You can skip this step and add numbers later from the SIPcity portal once your account is active.
You can also select additional services that you plan on using with your account, like nbn® Business Internet, international numbers, and more. These will be set up after your signup is complete.
A couple of pointers:
This is the final step, where you review your plan and enter payment details. Here you can:
Payment is processed securely by Square. SIPcity doesn’t store your full credit card details, and Square only uses your information to process your payment. No amount is charged until your account is activated.
When you’re ready, tick the box to confirm you agree to the terms, then click Sign Up.
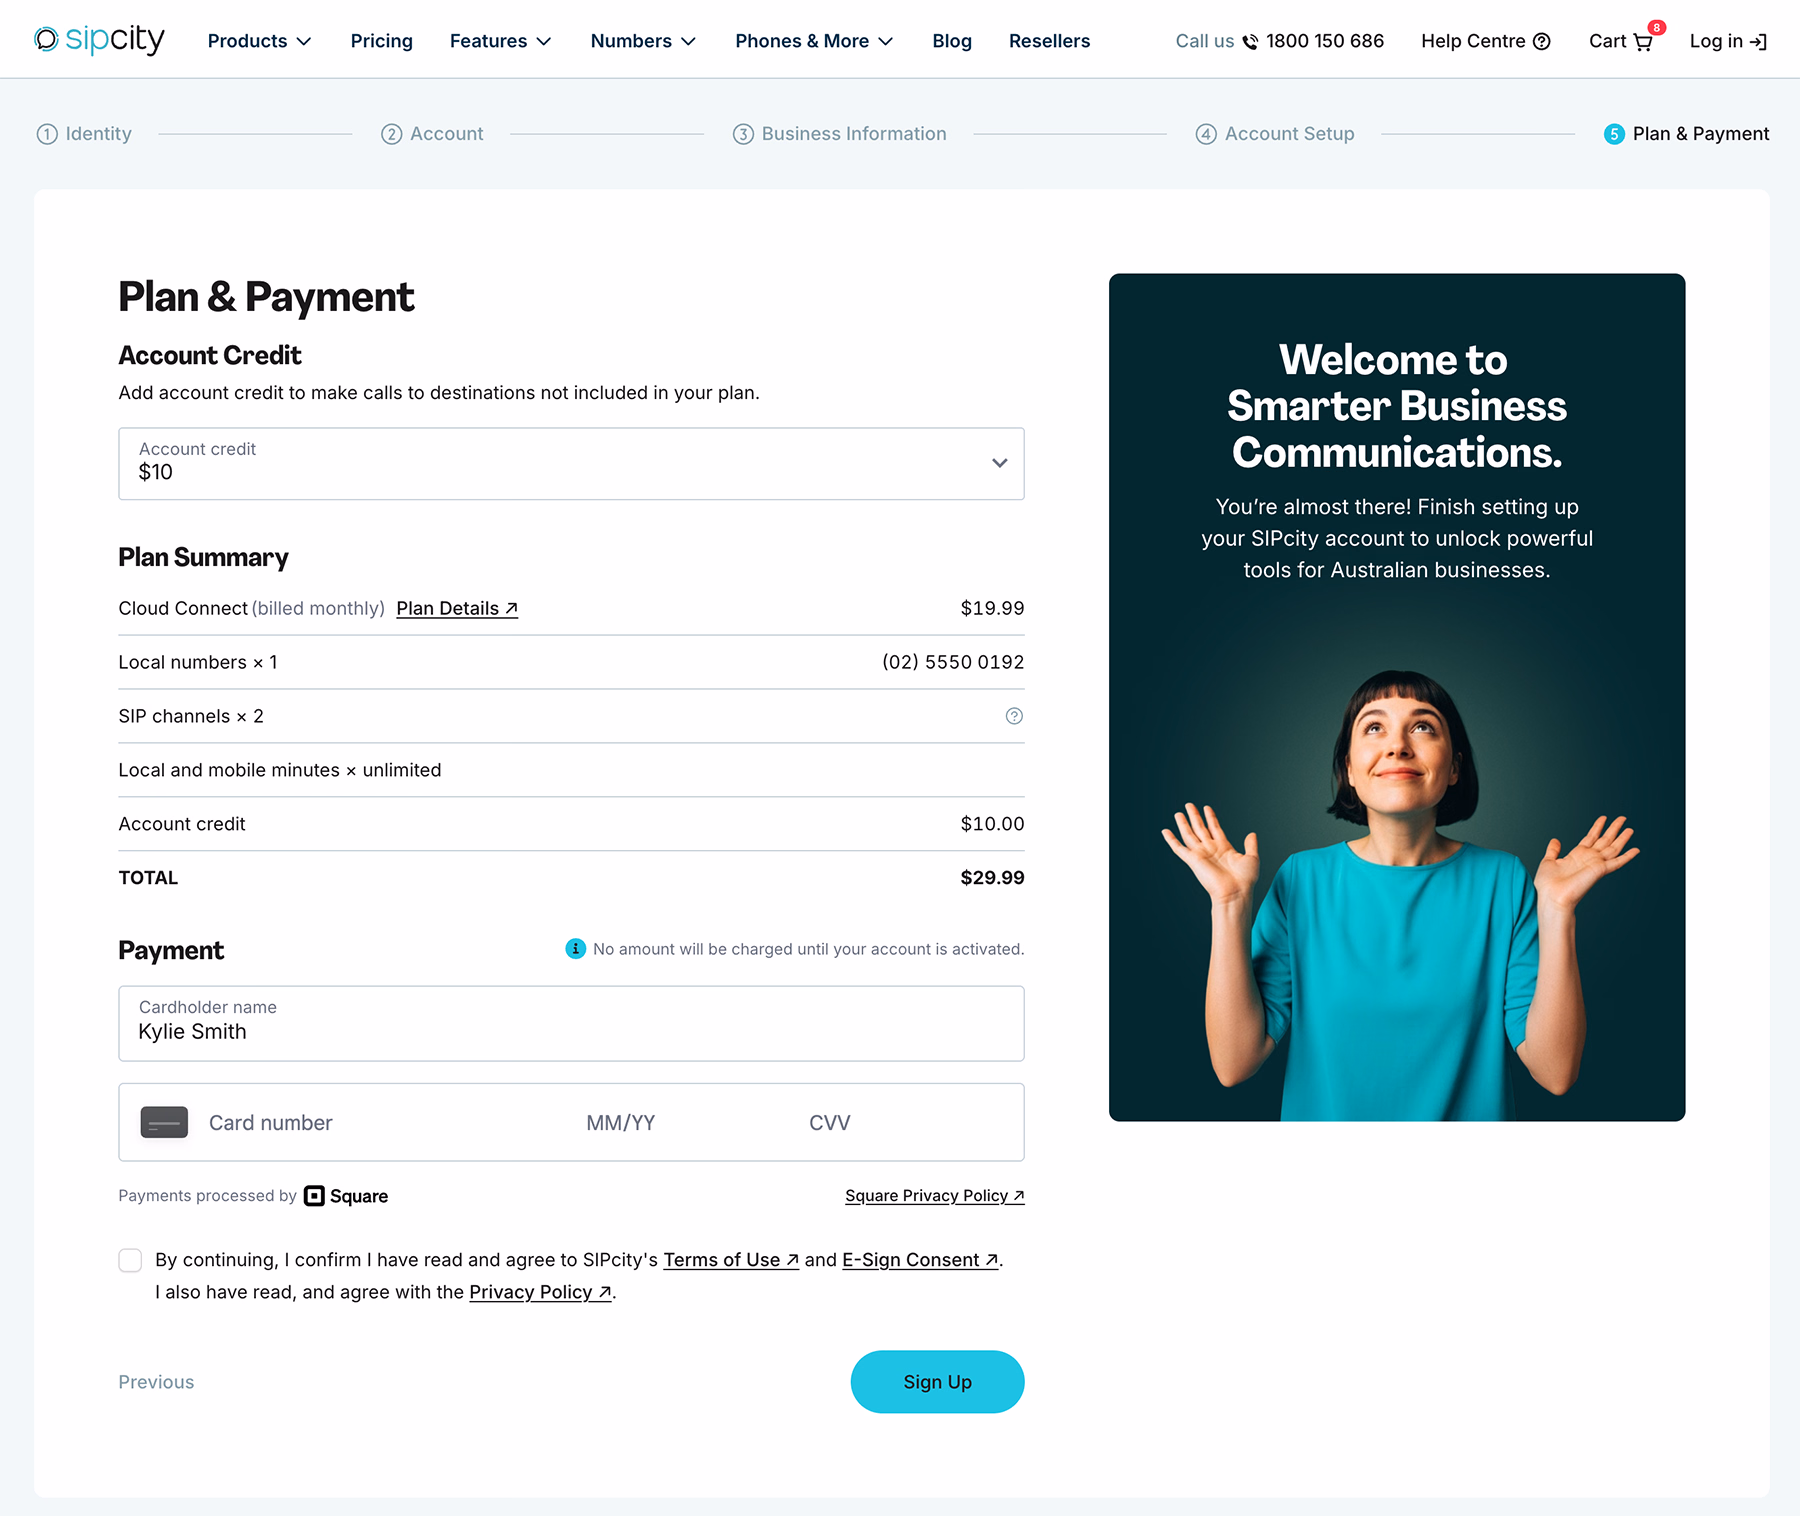
That’s it — your signup is complete. Most accounts are activated automatically. Accounts that require additional review are assessed by the SIPcity team within 1–2 business days.
If you’re porting a number, check porting timeframes with SIPcity, as these vary.
Need a hand? Reach out to the SIPcity team and we’ll help you get set up.