
1. Cisco SPA – IP Phones
Connect the Cisco SPA to the SIPcity service using the steps below.
Note – Cisco does not support encryption for remote device configuration.
1.1 Cisco SPA Web UI
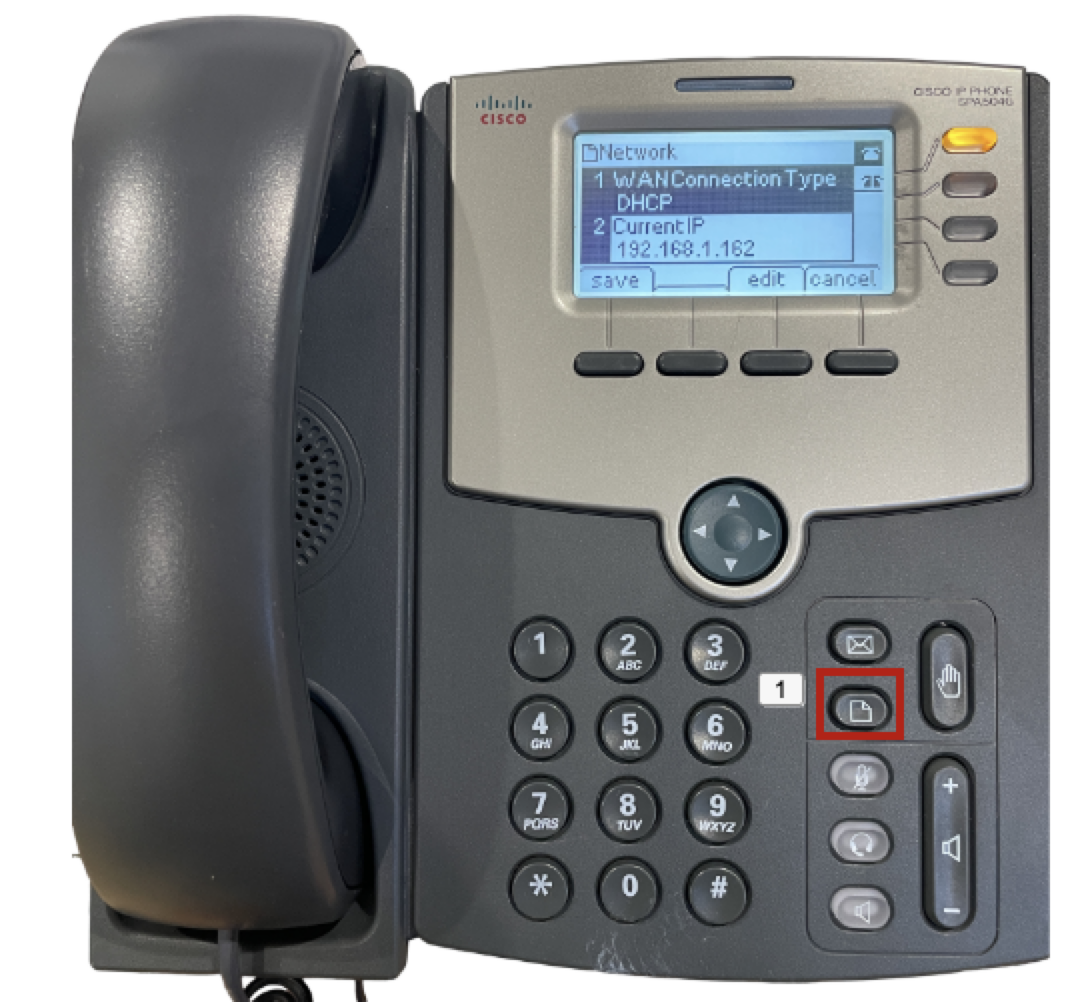
- Find the phone’s IP address by pressing the Settings button on the handset (highlighted in the screenshot below).
- Navigate to Network (9) > Current IP and copy the IP address.
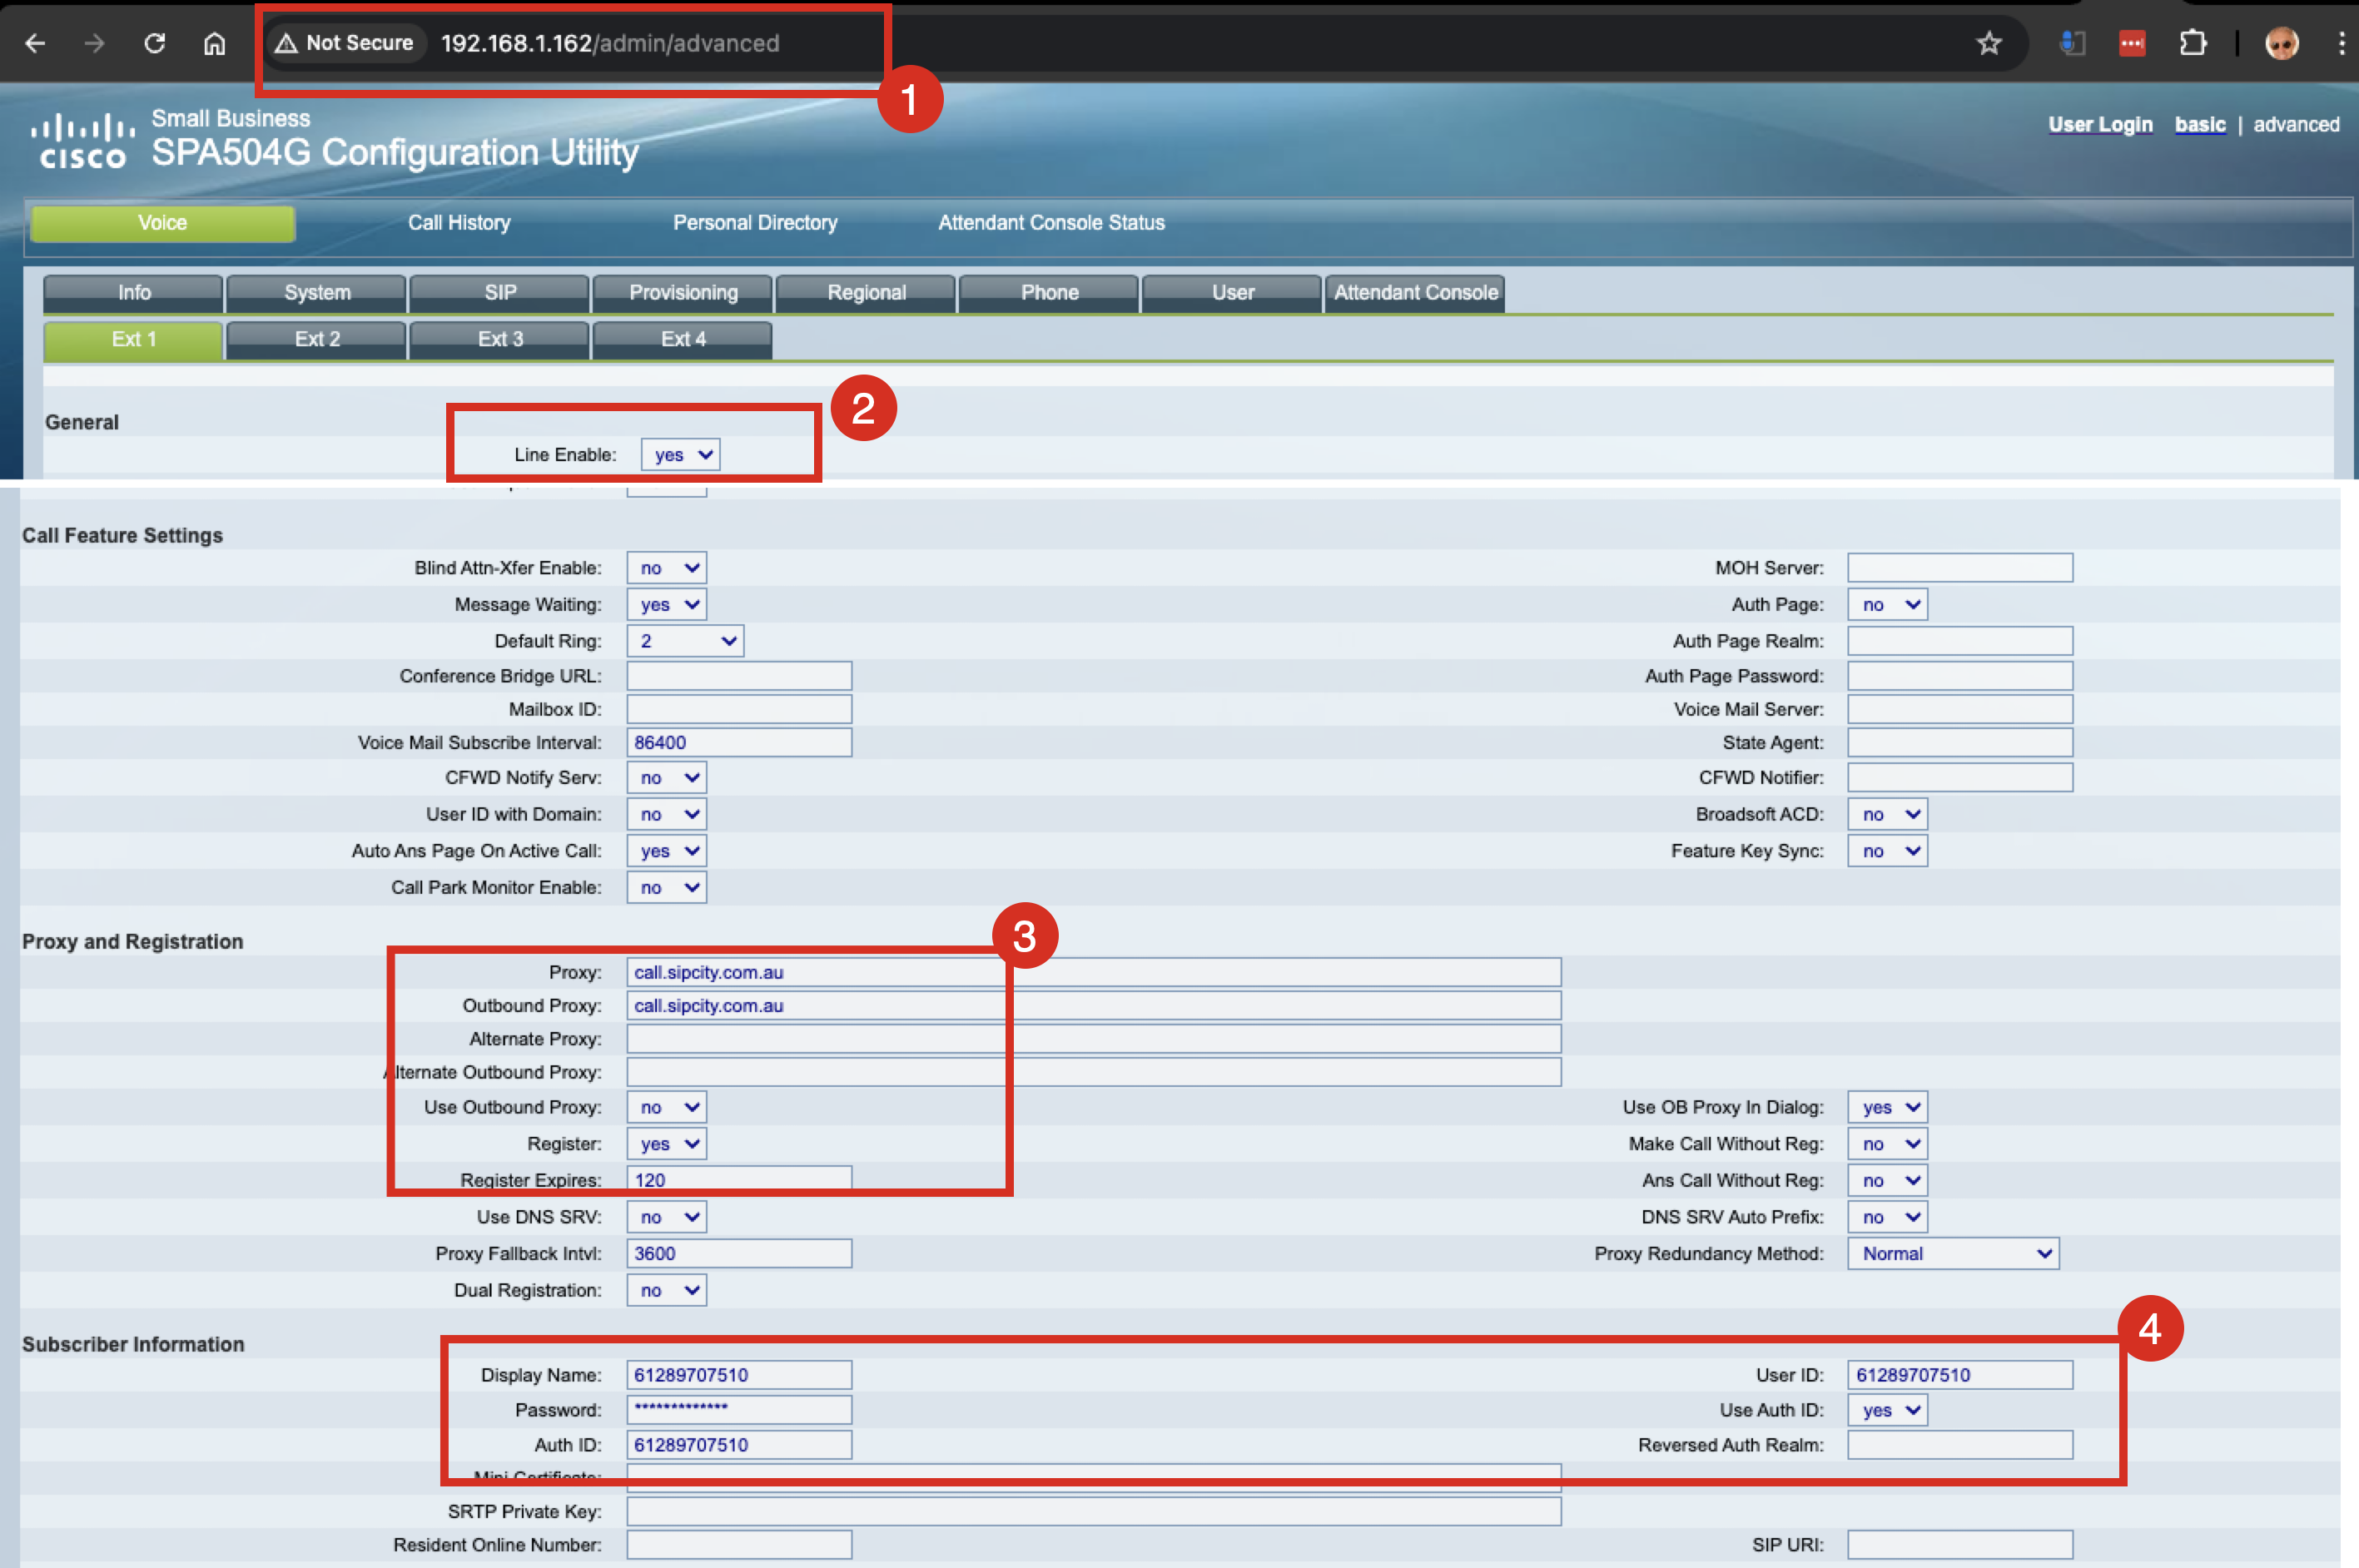
- Access advanced settings by typing http://<address>/admin/advanced into your browser (e.g. 192.168.1.168/admin/advanced).
1.2 Extension tabs
Configure the Cisco SPA using the Extension tabs. Complete the following settings:
1. General
- Line Enable: Set to Yes
2. Proxy and Registration
- Proxy + Outbound Proxy: call.sipcity.com.au
- Register: Yes
- Reg Expires: 120
3. Subscriber information
- Display Name: Can be a human name or phone number
- Auth ID: Full phone number including country code (e.g. +612…)
- User ID: Full phone number including country code
Additional extensions
If you are not registering additional lines on the Cisco SPA, disable the remaining extensions:
- Ext2, Ext3, Ext4: Set Line Enable to No
2. Time zones
- Type the IP address into your browser followed by /admin/advanced (e.g. 192.168.36.172/admin/advanced).
- Navigate to System > Optional Network Configuration > Primary NTP.
- Enter time.google.com.
Daylight saving time rules
- Type the IP address into your browser followed by /admin/advanced (e.g. 192.168.36.172/admin/advanced).
- Navigate to Regional > Miscellaneous > Daylight Saving Time Rule.
- Enter the rule: start=10/30/-7/2:0:0;end=4/1/7/2:0:0;save=1
3. Restart your Cisco SPA
- Press the Settings key.
- Select Device administration.
- Select Restart.
- Select OK when prompted to reboot.
- The phone will restart.