
Purpose
Call Screening allows users to screen incoming calls before answering by hearing the caller’s name or number announcement. Furthermore, this intelligent filtering system provides options to accept, reject, or send calls to voicemail. Because privacy matters, users can configure screening based on caller identification and customized screening criteria.
How to Navigate
Start by logging into the SIPcity portal. Subsequently, go to SwitchBoard | Inbound | Call Screening Options section.
How to Configure
- Activate Call Screening toggle
- Configure Active screening criteria
- Set up Screening prompts and announcements
- Define Blacklist numbers for automatic screening
- Configure Whitelist Numbers for bypass
- Set up caller identification requirements
- Save and test the screening functionality
Call Screening Settings
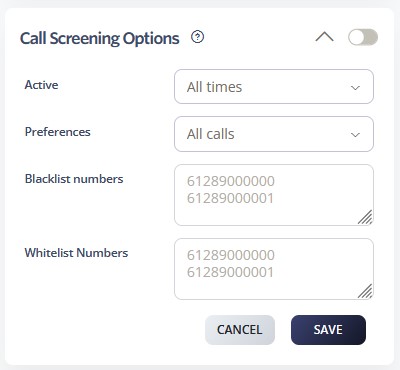
- Active Schedule: Defines the timeframe during which the call queue is active. Options include All Times, During Work Hours, Outside Work Hours, During Available Hours, Outside Available Hours, During User-Defined Hours, and Outside User-Defined Hours. For additional details, please refer to the Time Schedules Guide.
- Preferences: Within this section, you can define the types of calls to be managed under your selected settings. Options include: All Calls, Spam Calls, and Anonymous Calls.
- Blacklist Numbers: Specify numbers that are not permitted to contact you. This list functions in addition to numbers automatically blocked under your rejection settings.
- Whitelist Numbers: Specify numbers that are always permitted to reach you, ensuring they bypass any rejection settings that would otherwise block them.
Call Flow Priority – #8
Call Screening Options function at priority level 8. Consequently, users can screen and verify incoming callers before routing.
Conference → Rejection Strategy → Auto Attendant → Call Queue → Sim Ring → Do Not Disturb → Preserve CLI → Call Screening
Learn more about Call Flow Priority →